Amazon Web Services Account Set Up for CloudMail
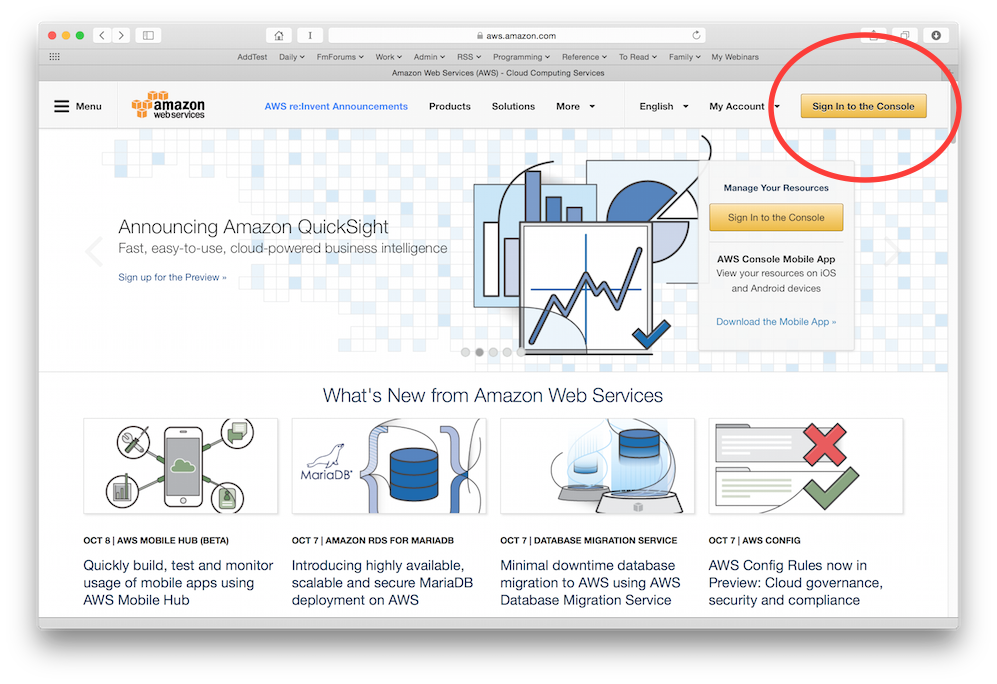
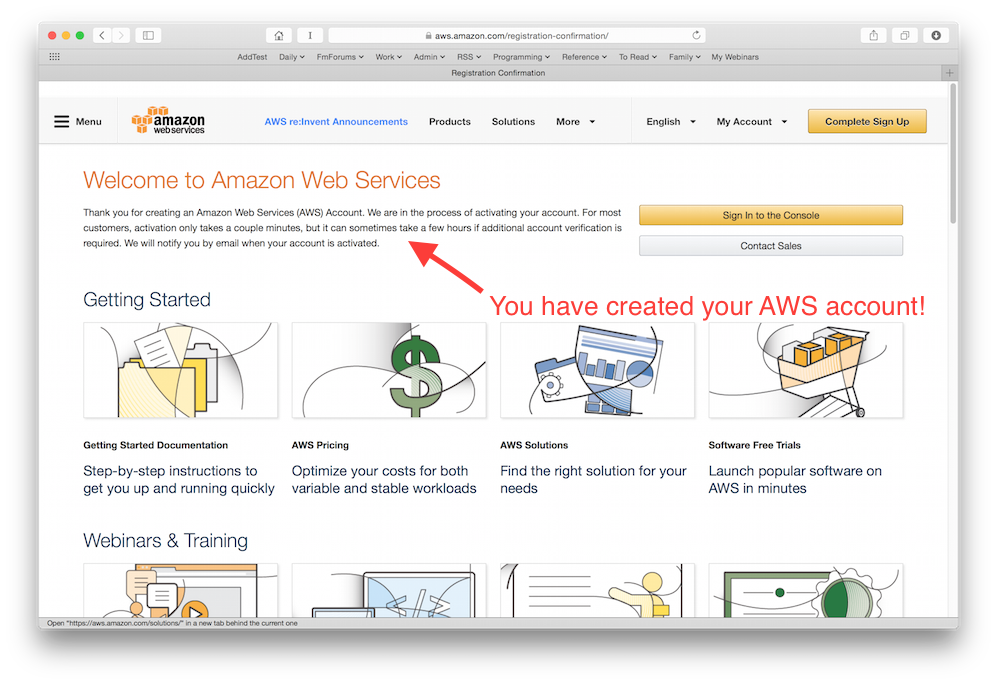
You can sign up for a free Amazon Web Services account from aws.amazon.com. Click the yellow button titled 'Sign In to the Console' to get started.
(Skip down if you already have an account but need to set up credentials)
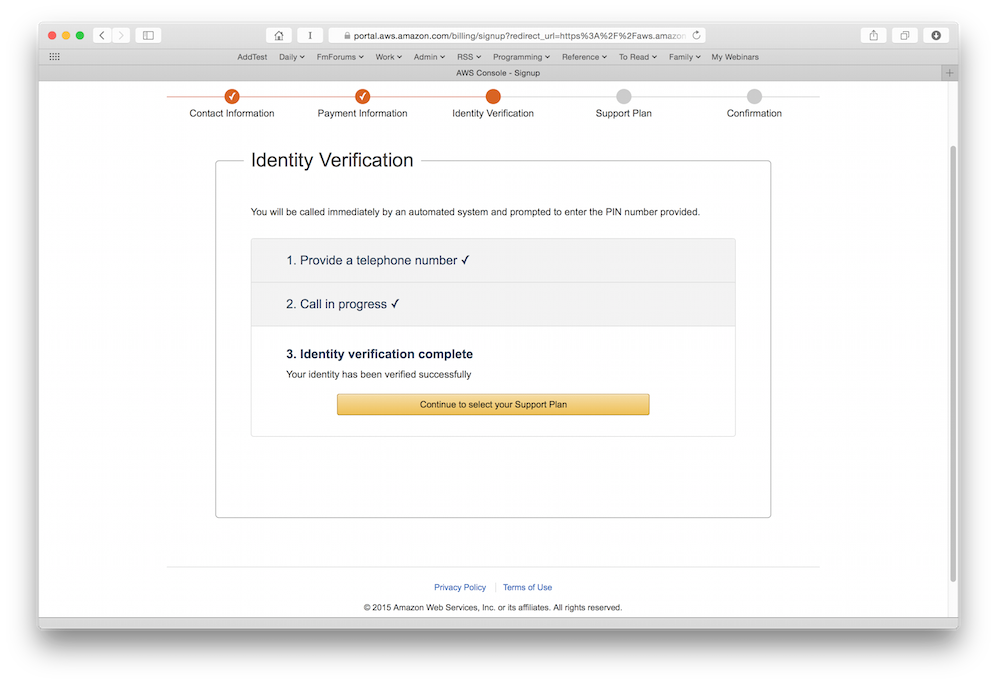
Verify your identity.
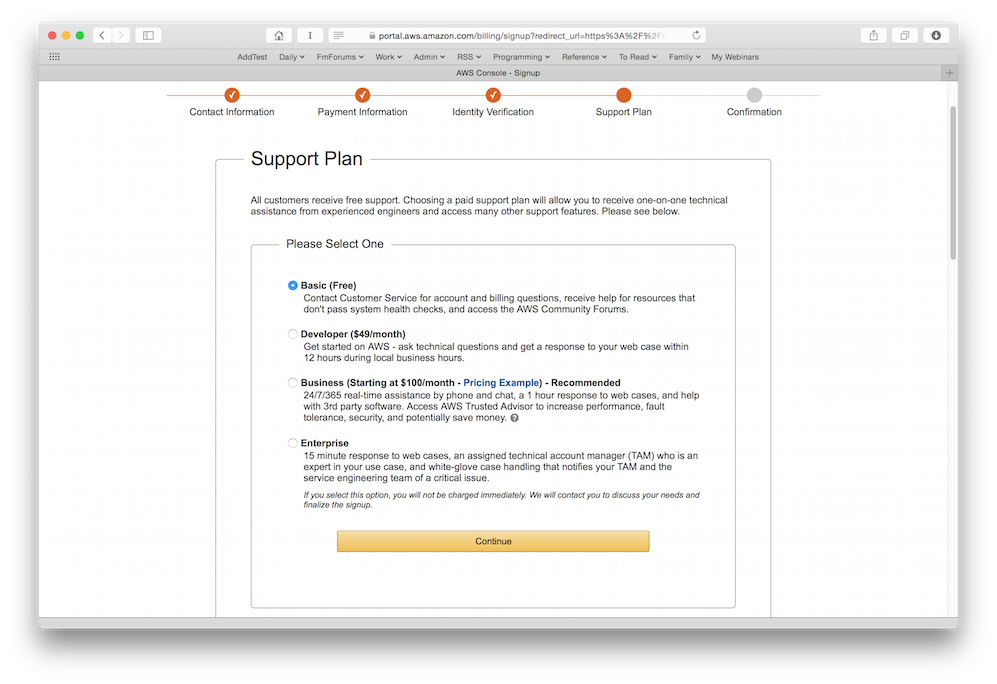
Select a support plan.
You have created your AWS account! The next step is ensuring you have received an Amazon access key and secret key...
Although it's not necessary, you may feel more comfortable creating a separate AWS username for CloudMail. If you decide to do this, be sure to add the 'AdministratorAccess' policy for CloudMail so that it's able to do all the setup steps that it needs.
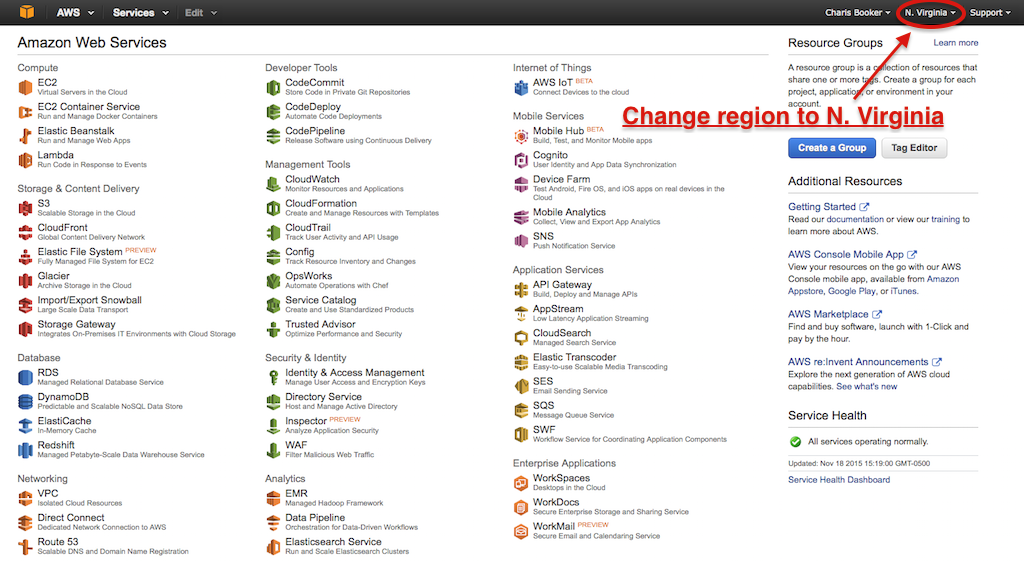
While you are in the AWS console home, be sure to change your region to N. Virginia (CloudMail will always use this region). This is important to do before moving into production mode.
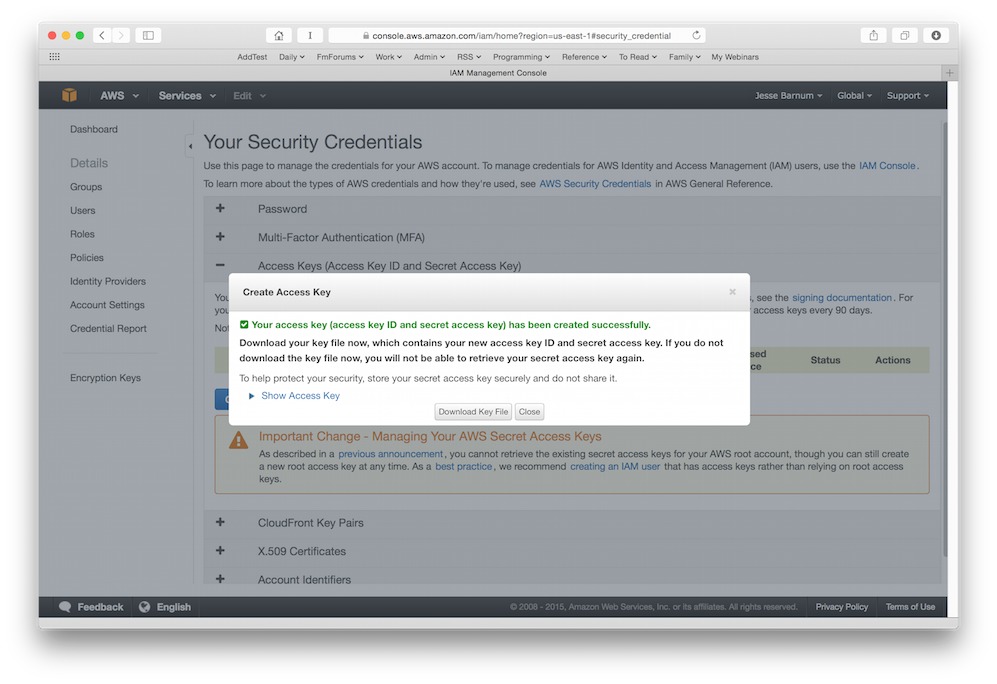
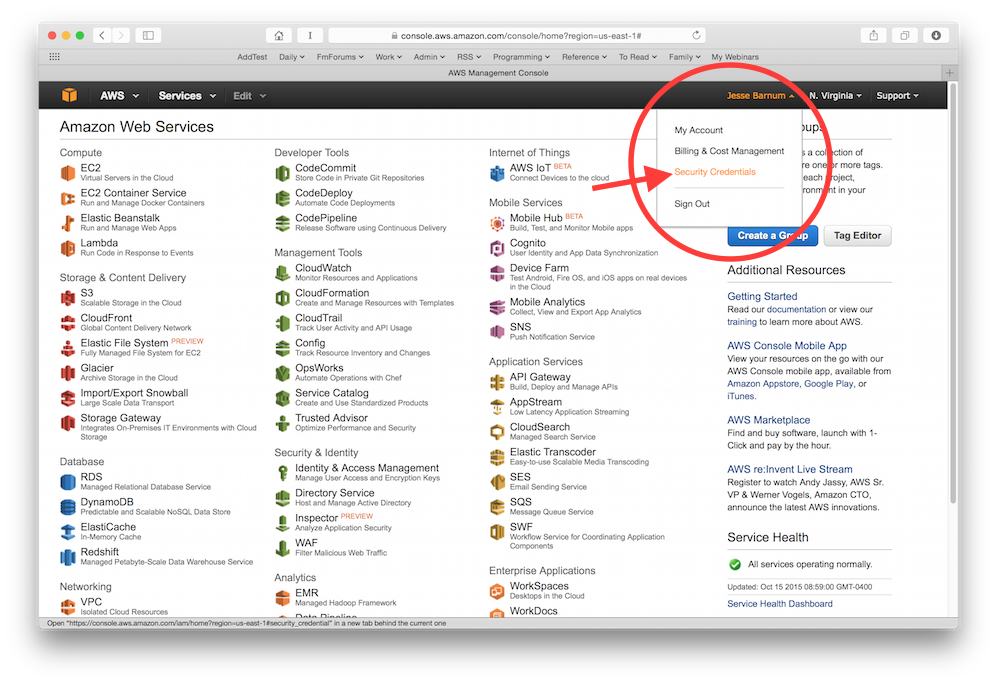
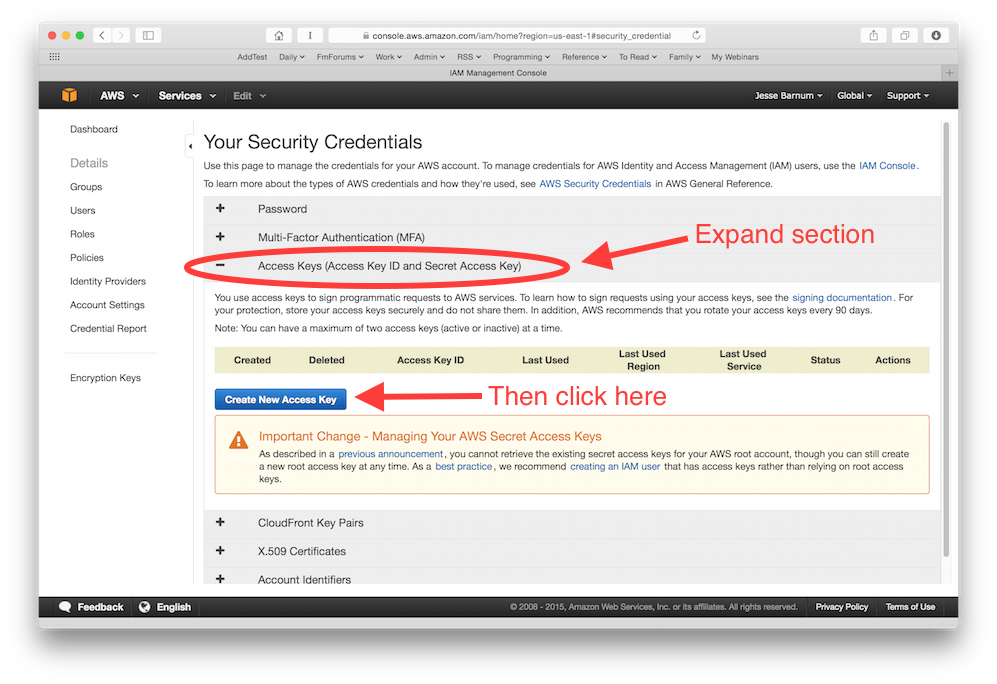
You should have received an Amazon access key and secret key when you set up your account. If you don't have those credentials, you can issue new ones by following this process in the AWS console.
Click your user name at the top right corner of the page and select 'Security credentials'
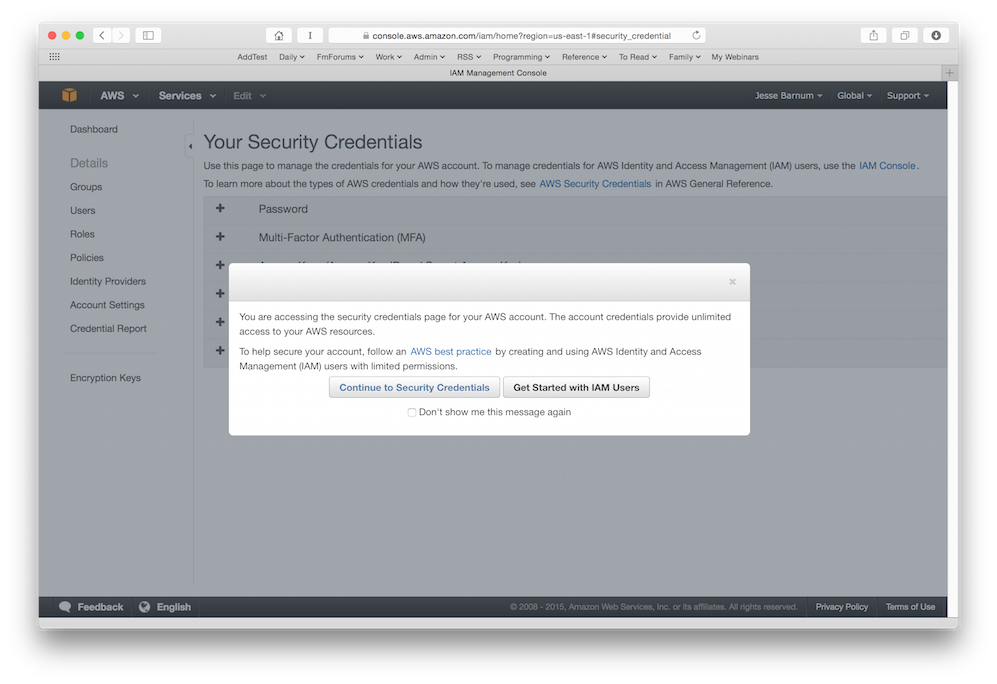
Continue to Security Credentials
Expand the 'access keys' section and click the blue 'Create new access key' button.
Download your Key File.
