Google - Set up OAuth Consent Screen
Overview
Google API Keys are needed for OAuth logins for a number of 360Works products. These keys can also be used to [Access FileMaker Databases using OAuth]. This guide will walk you through setting up an OAuth consent screen and getting Google API Keys.
Generate your own keys
Step 1 Go to https://console.developers.google.com/ . If you do not already have a Google account, you will need to create one. It is recommended that if you are setting this up that you go ahead and create a new account with a username and password that you are comfortable sharing with your users/co-workers
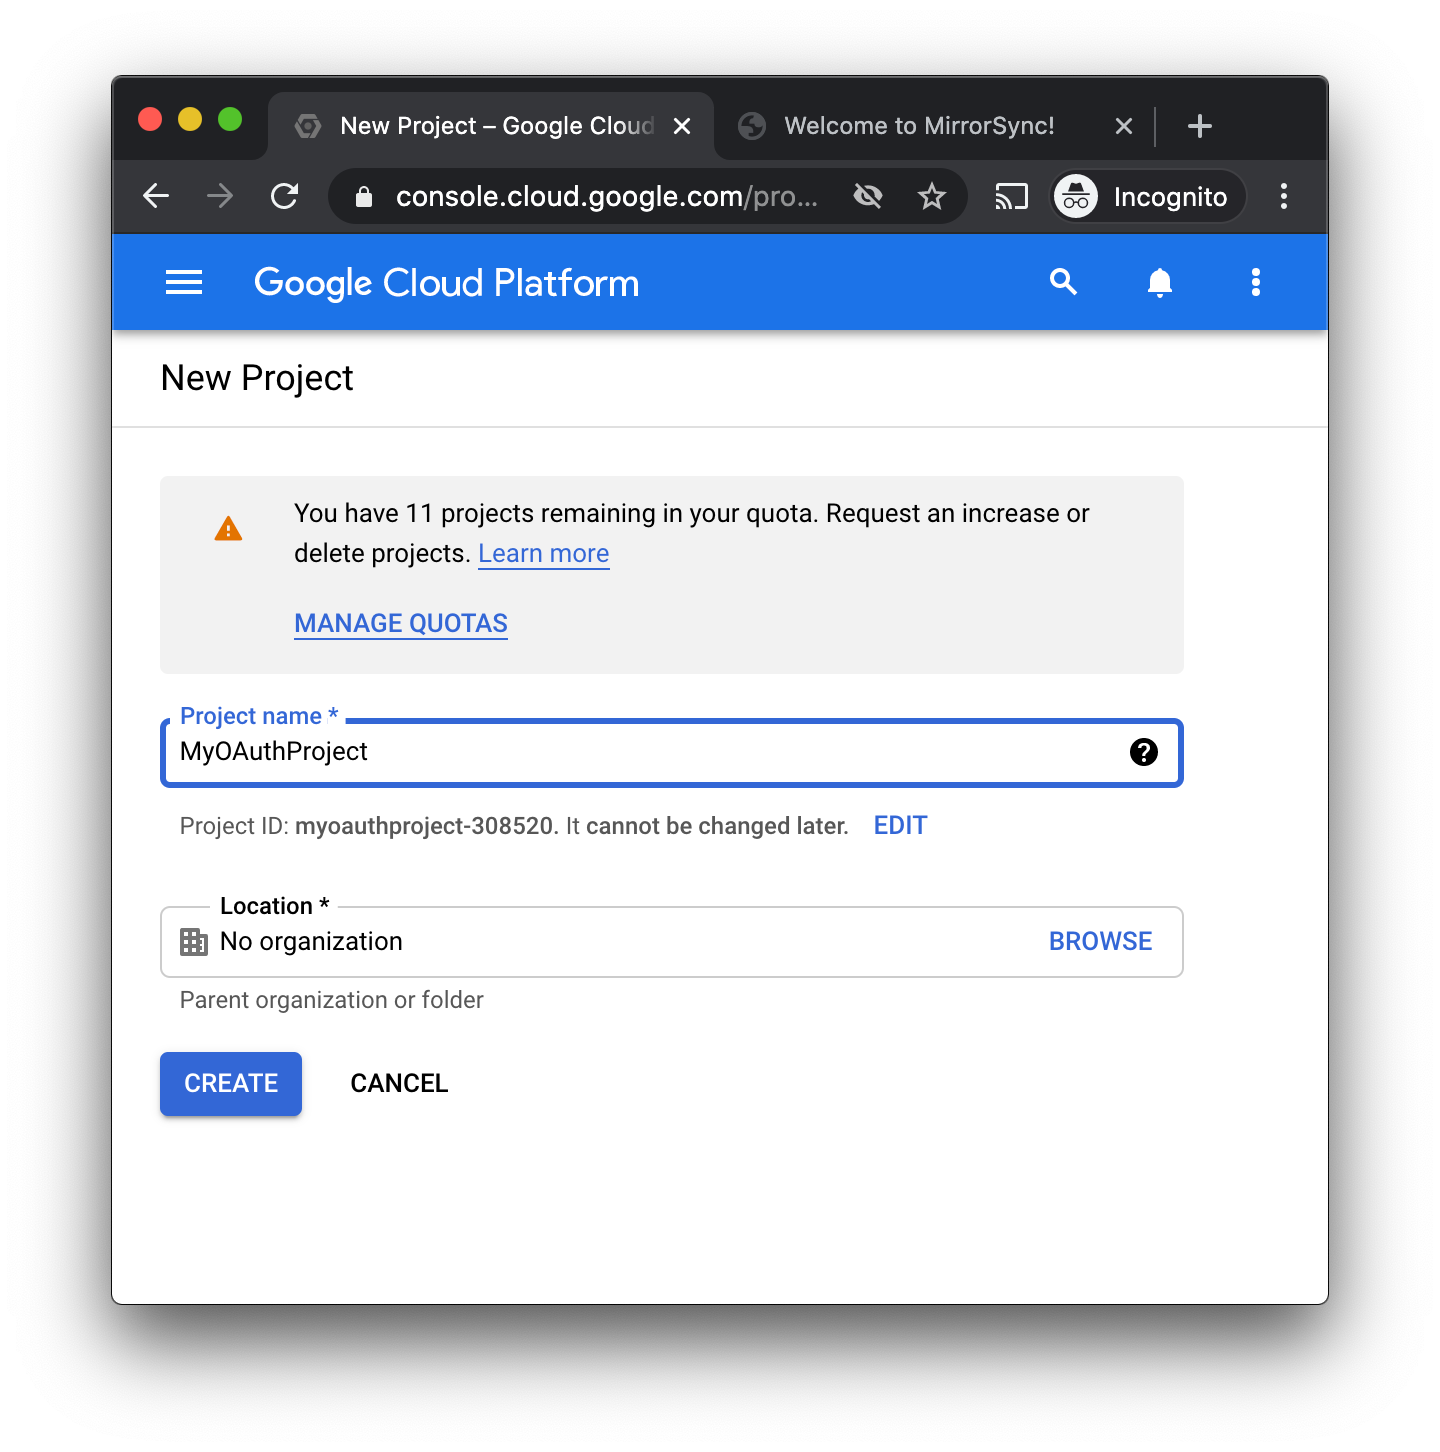
- Click Create Project.
- Give the project a name, then click "Create".
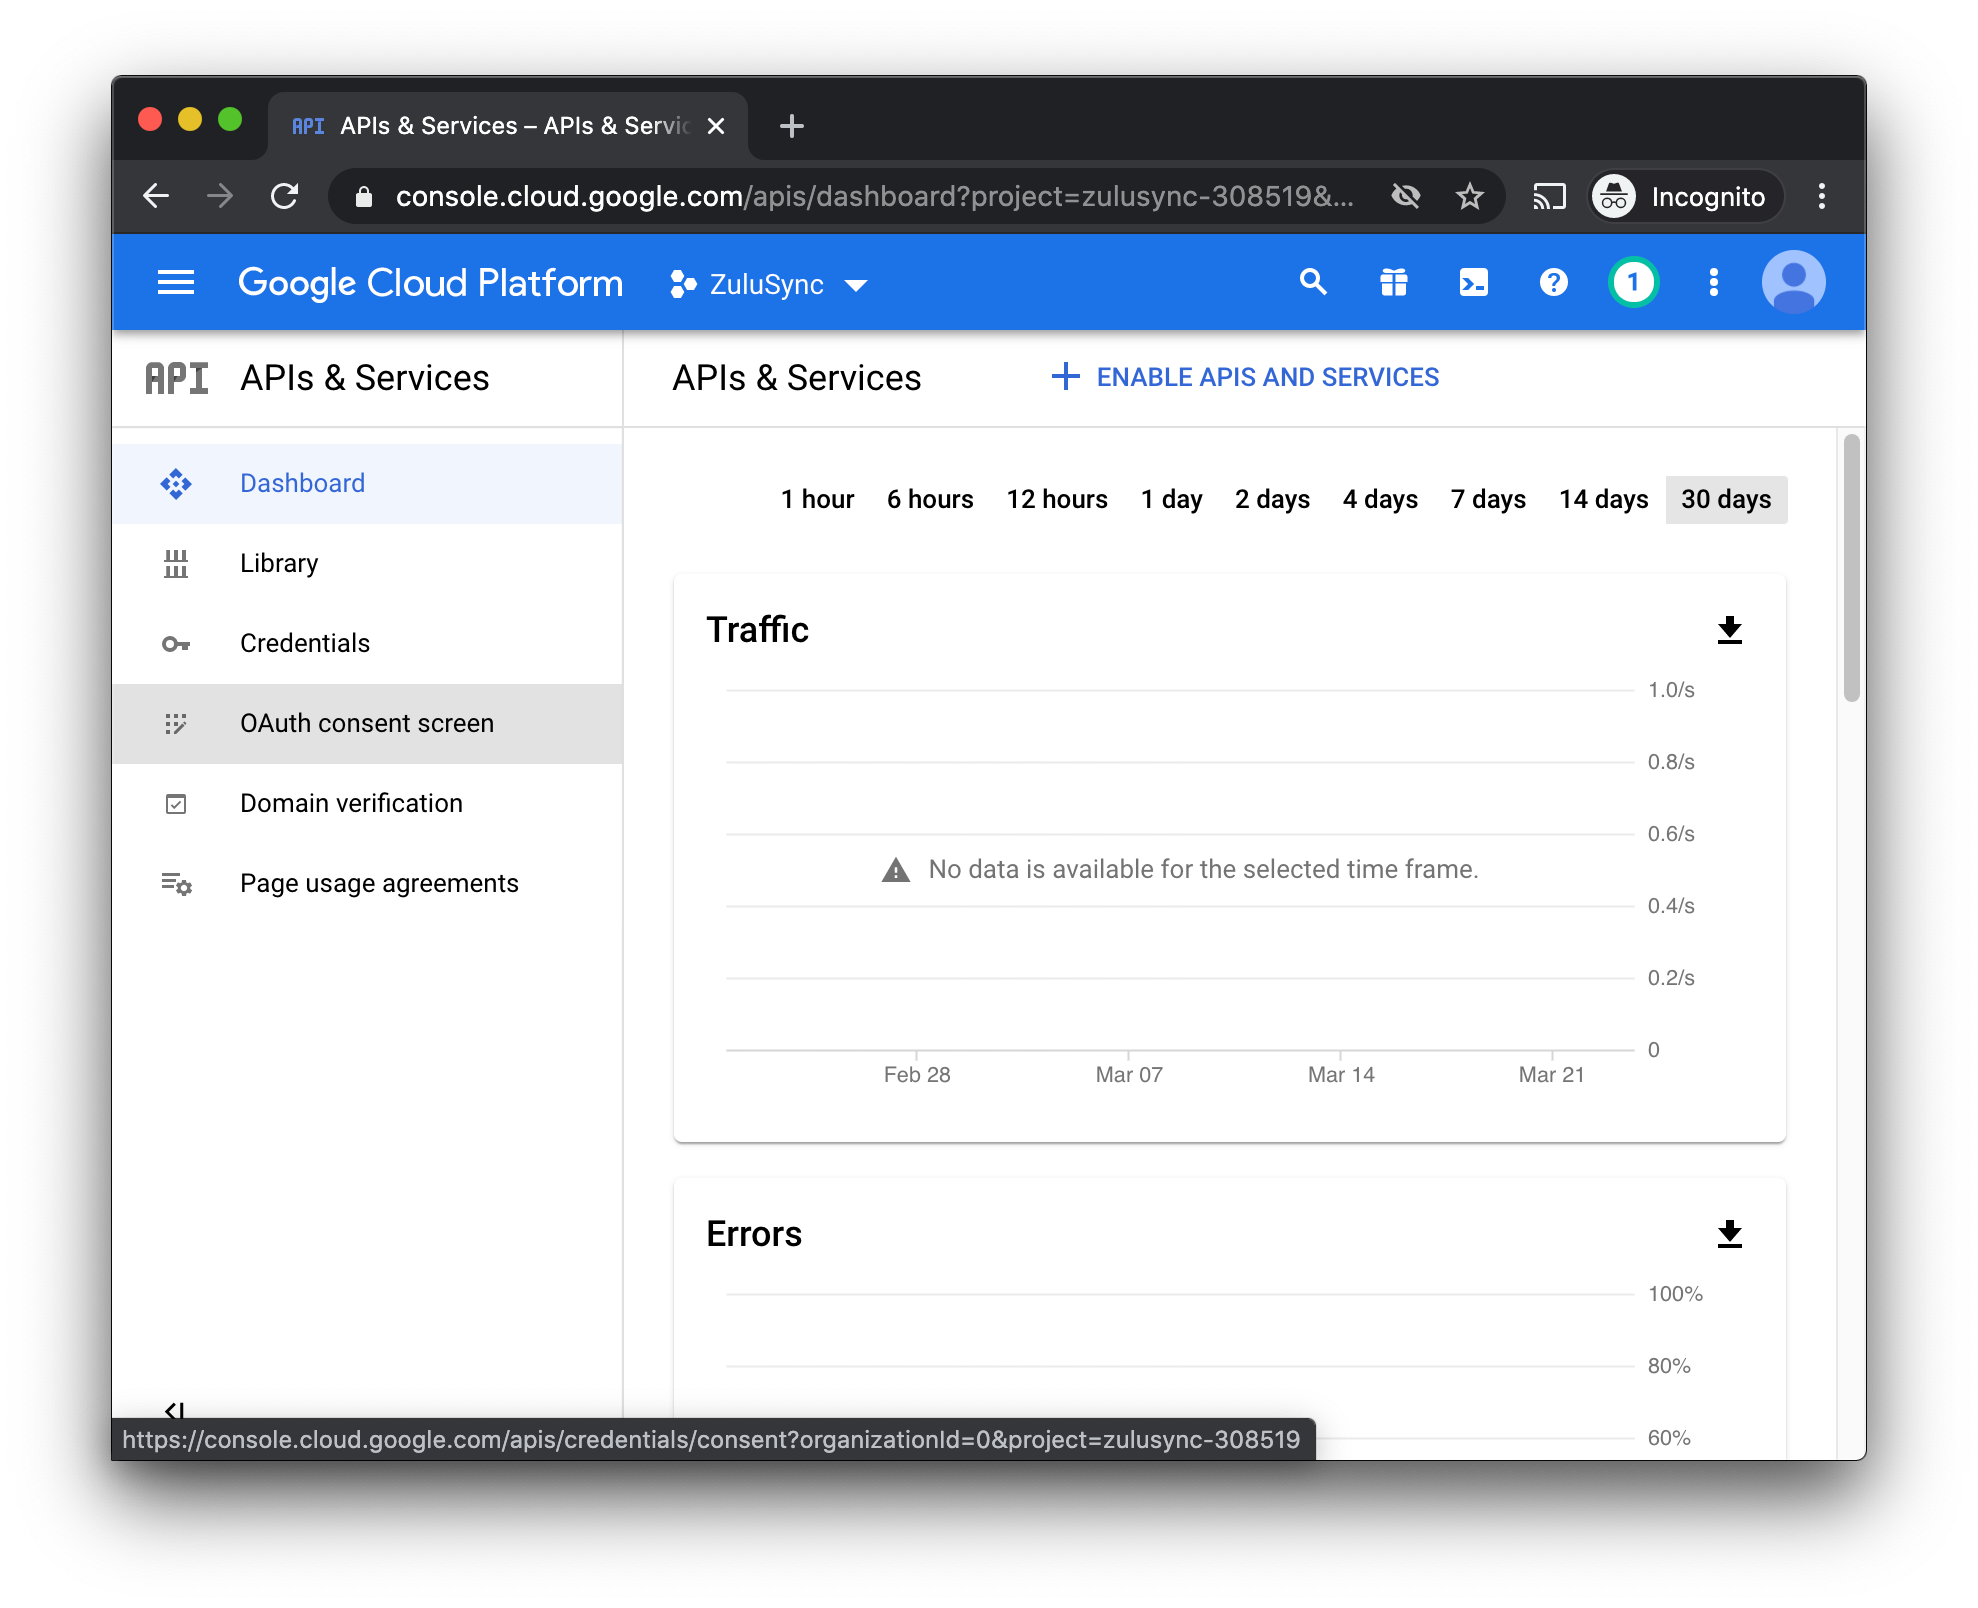
- Now let's set up the OAuth Consent Screen, use the menu to navigate there:
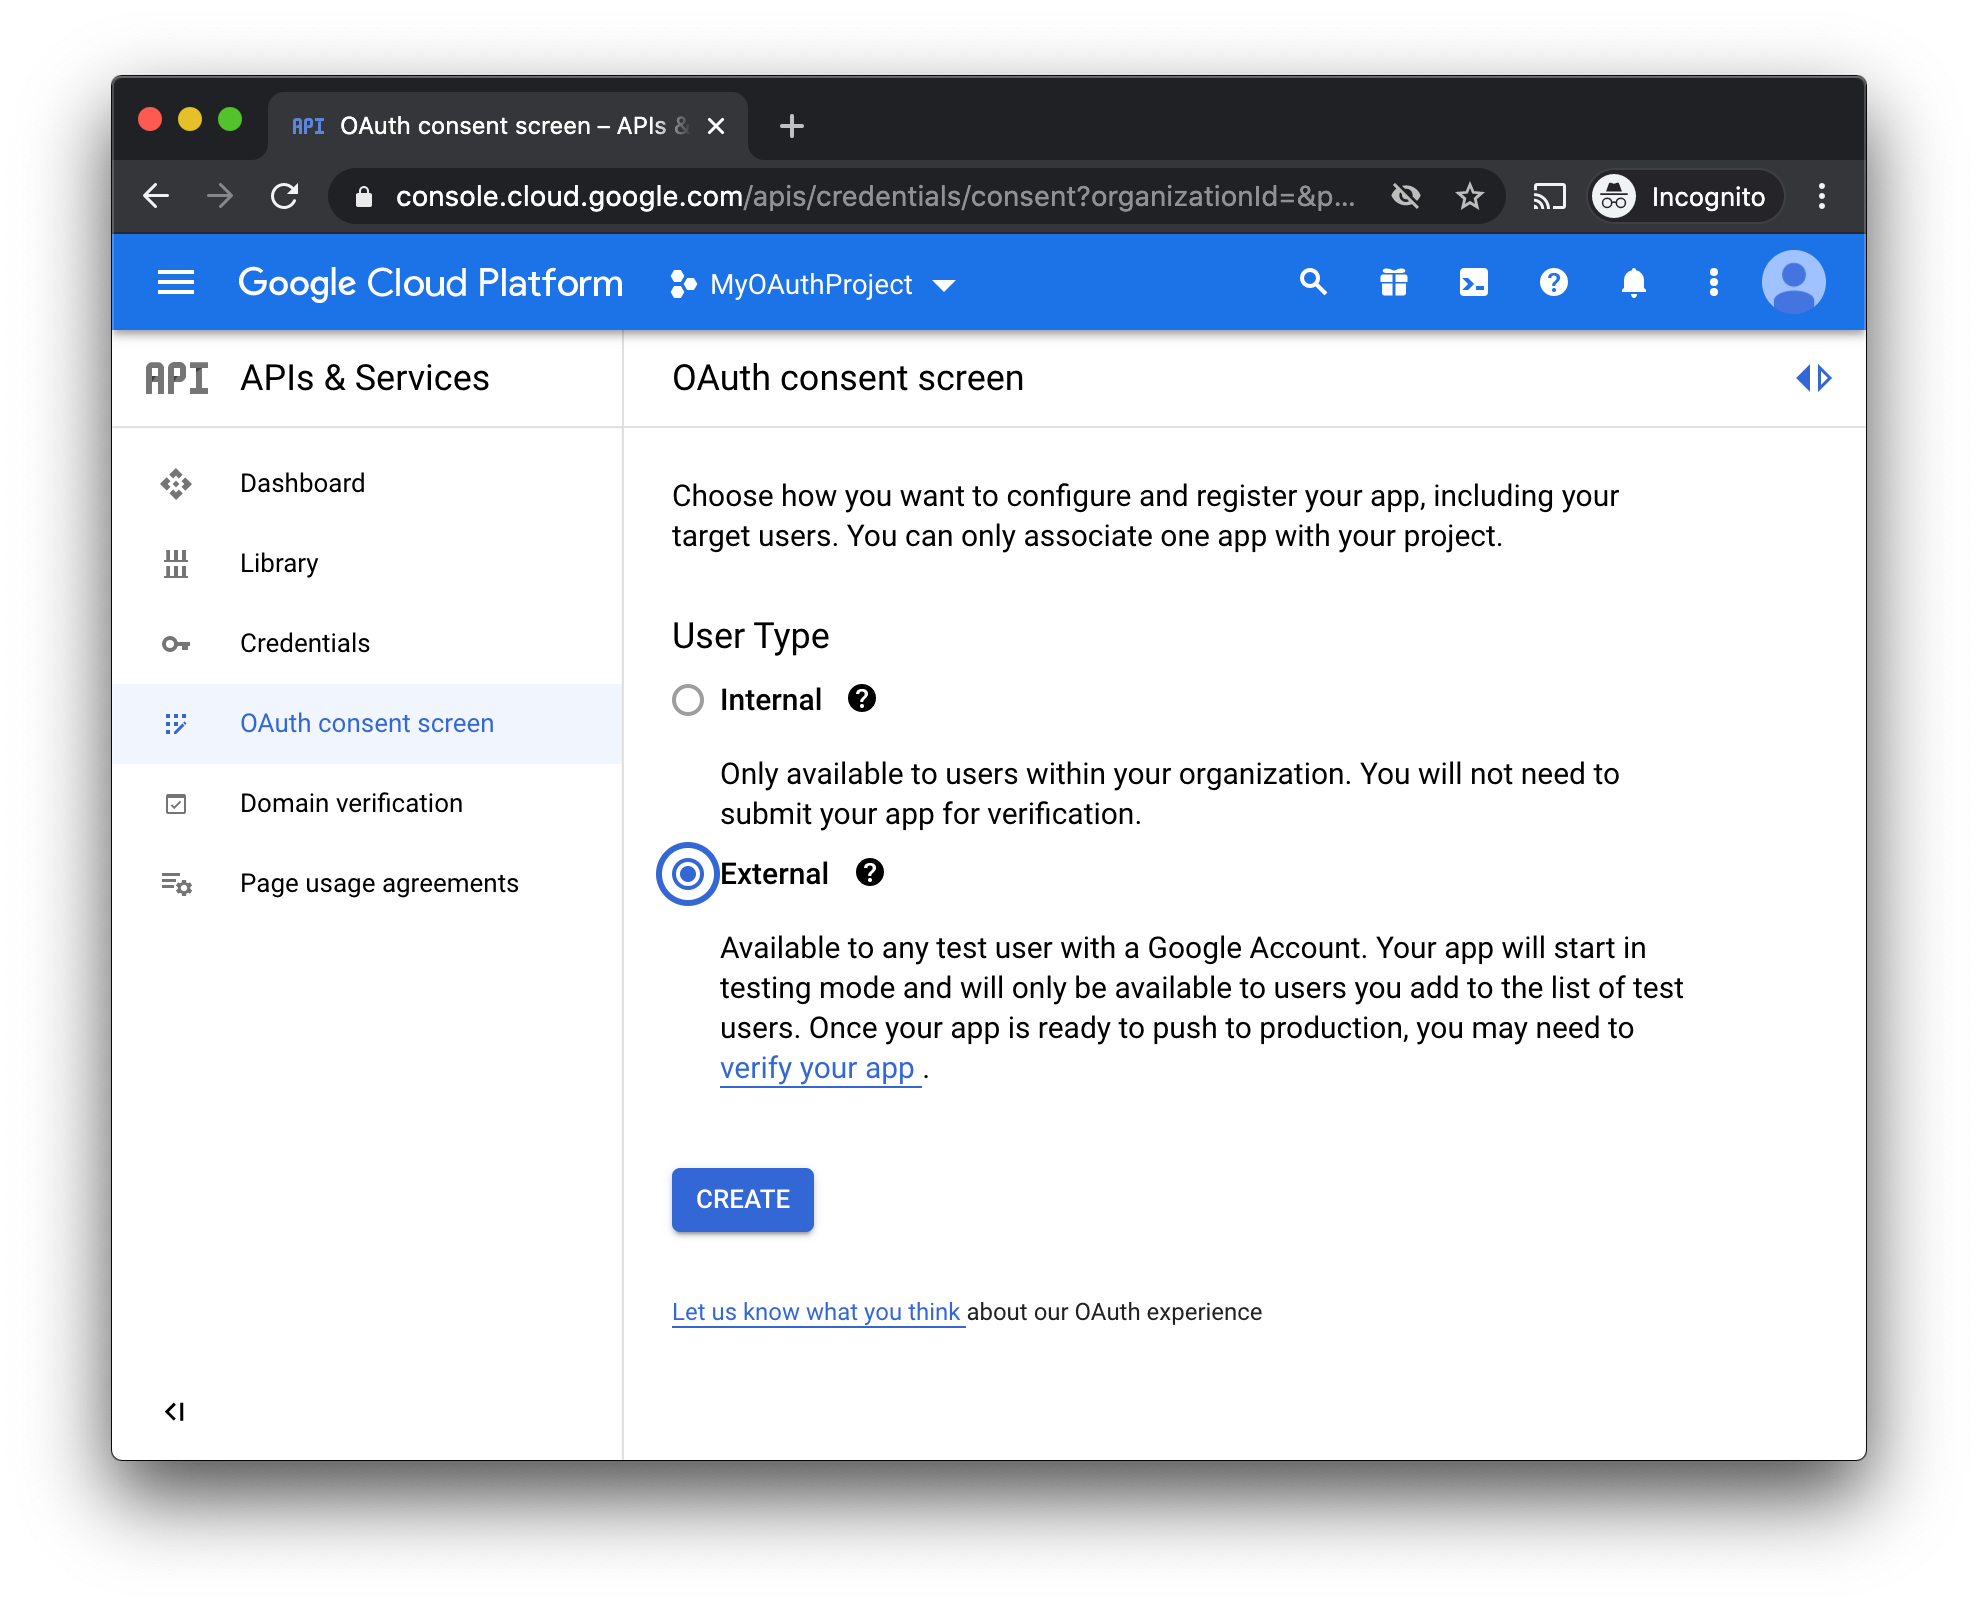
- For User Type, we will be using "External", which will work for anyone with a Google account, but will show a warning that the app is not verified. If you are a G Suite user, you may choose "Internal" here, and avoid the warning, but this will only work for users inside your G Suite account.
- Click "Create"
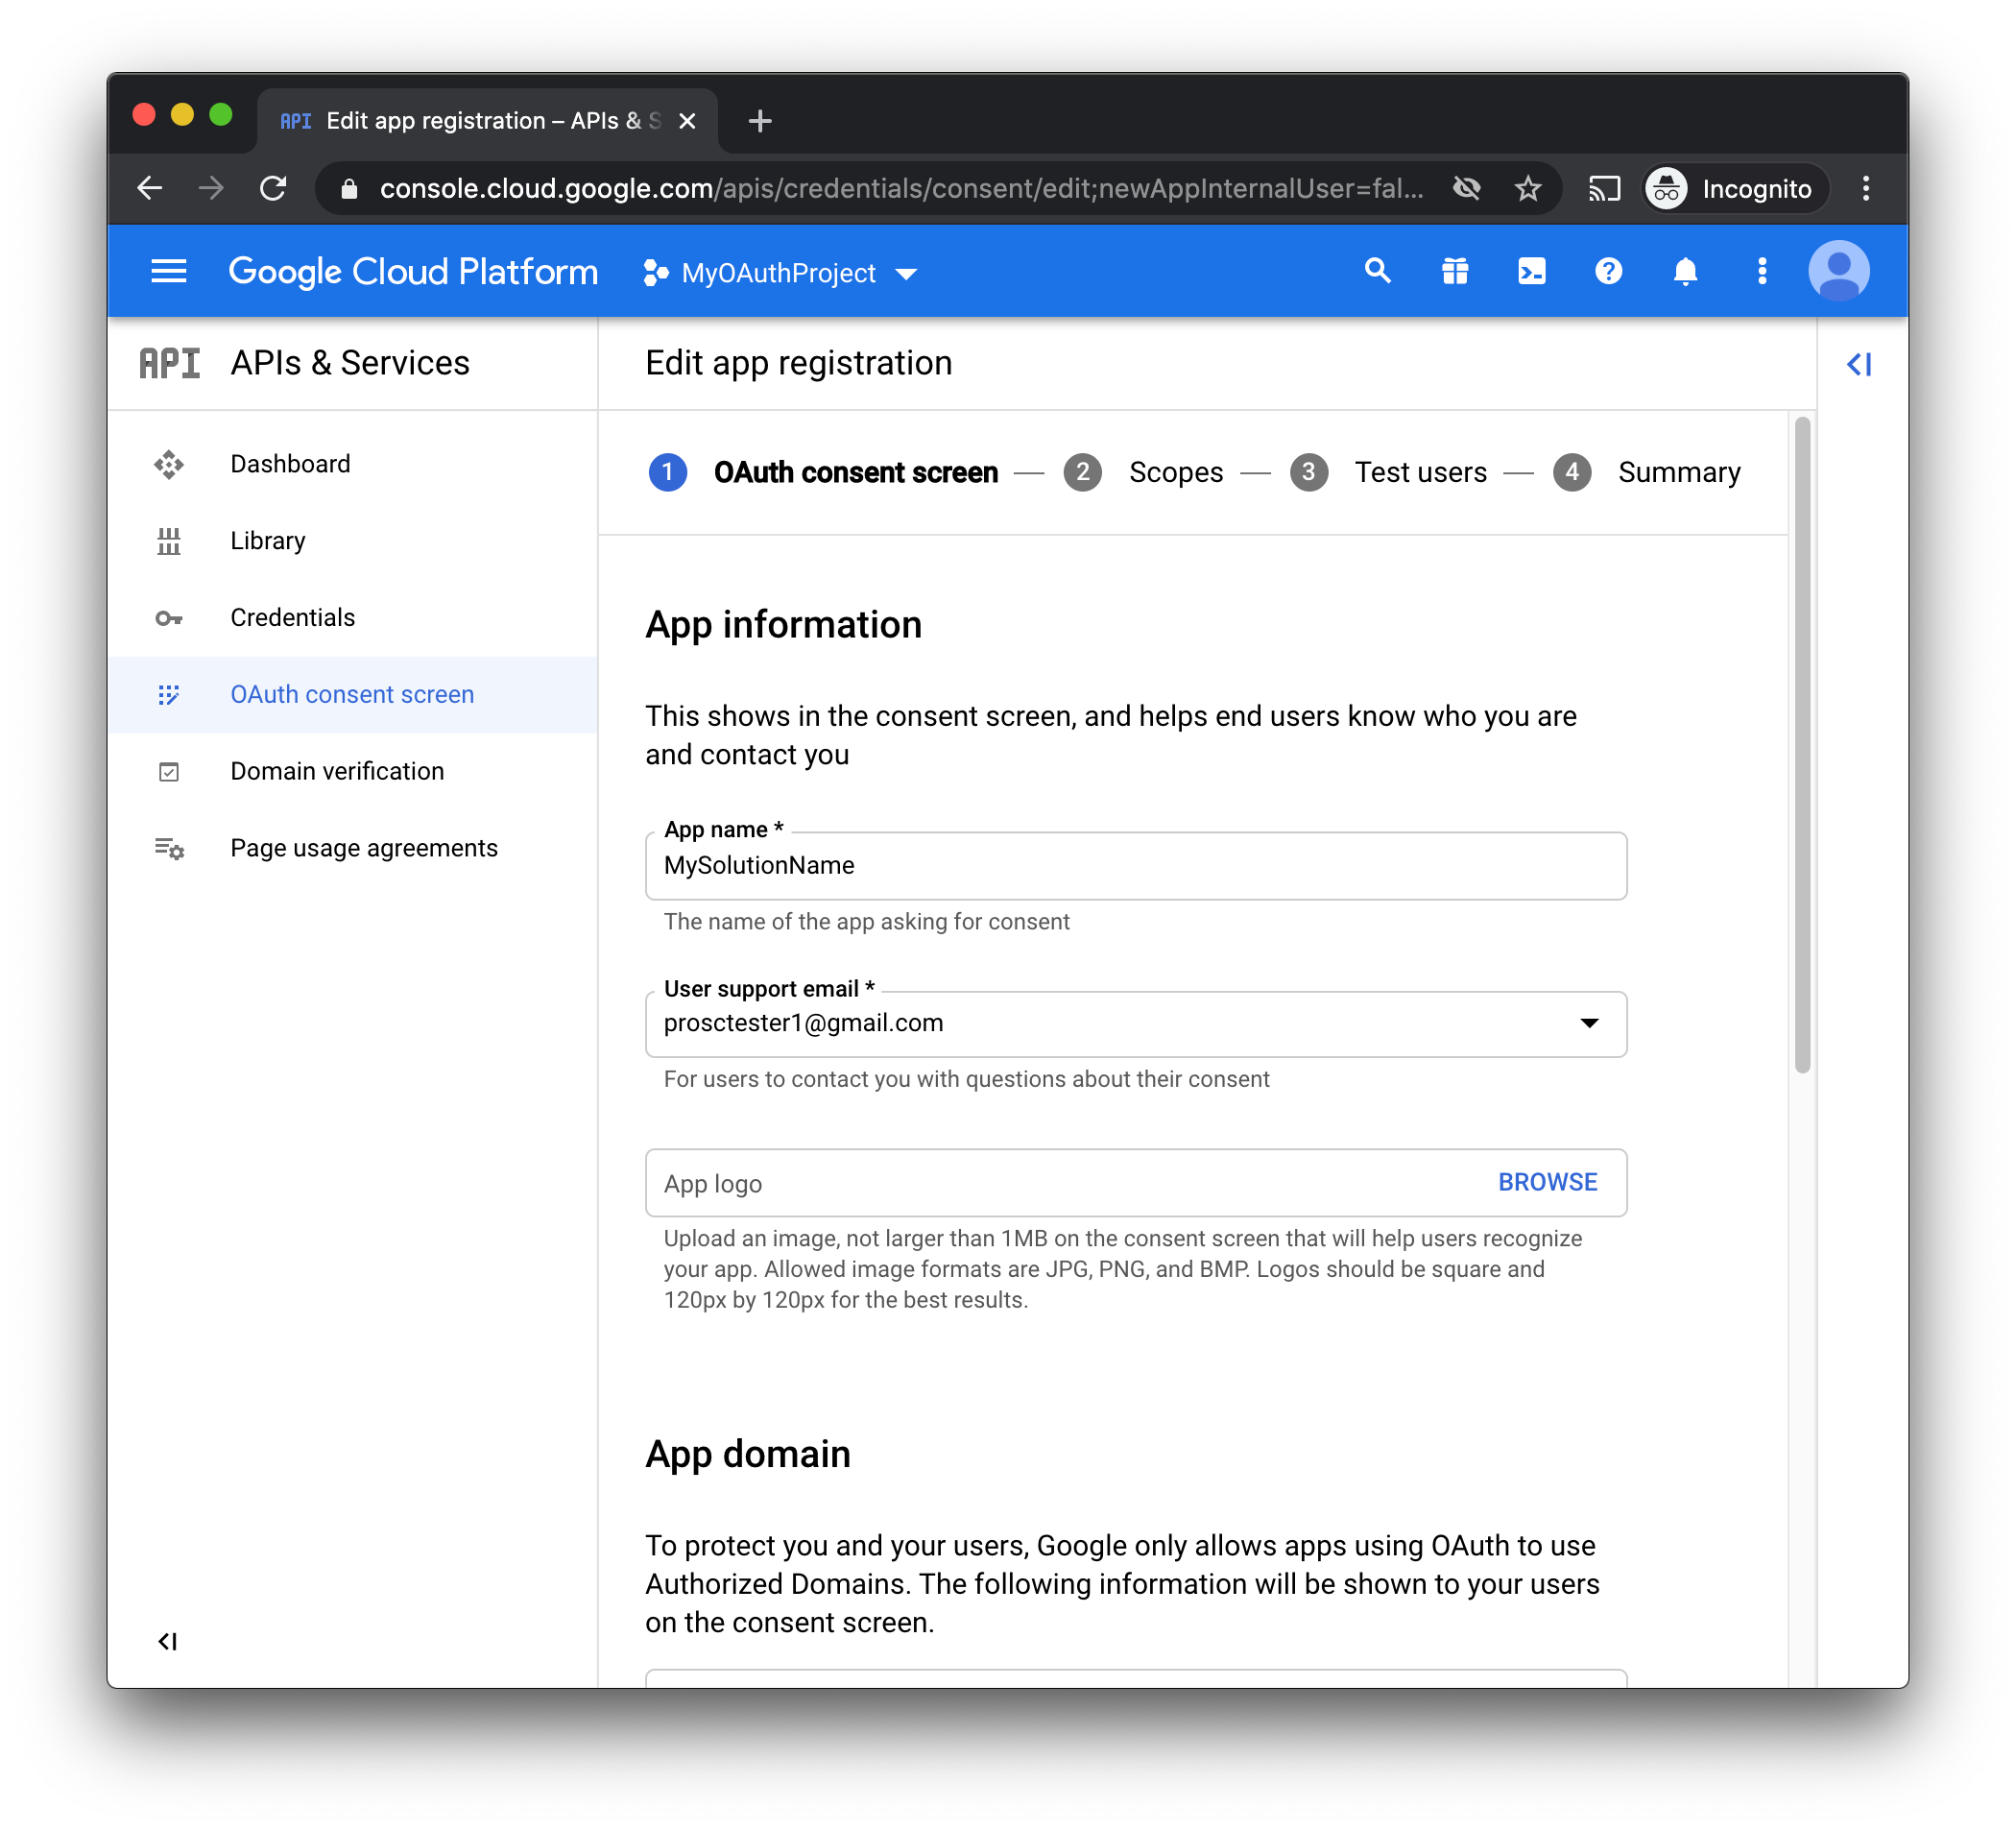
- On the next screen, fill out the following required fields:
- App Name (Can be anything)
- User Support Email (Use your logged in Gmail address)
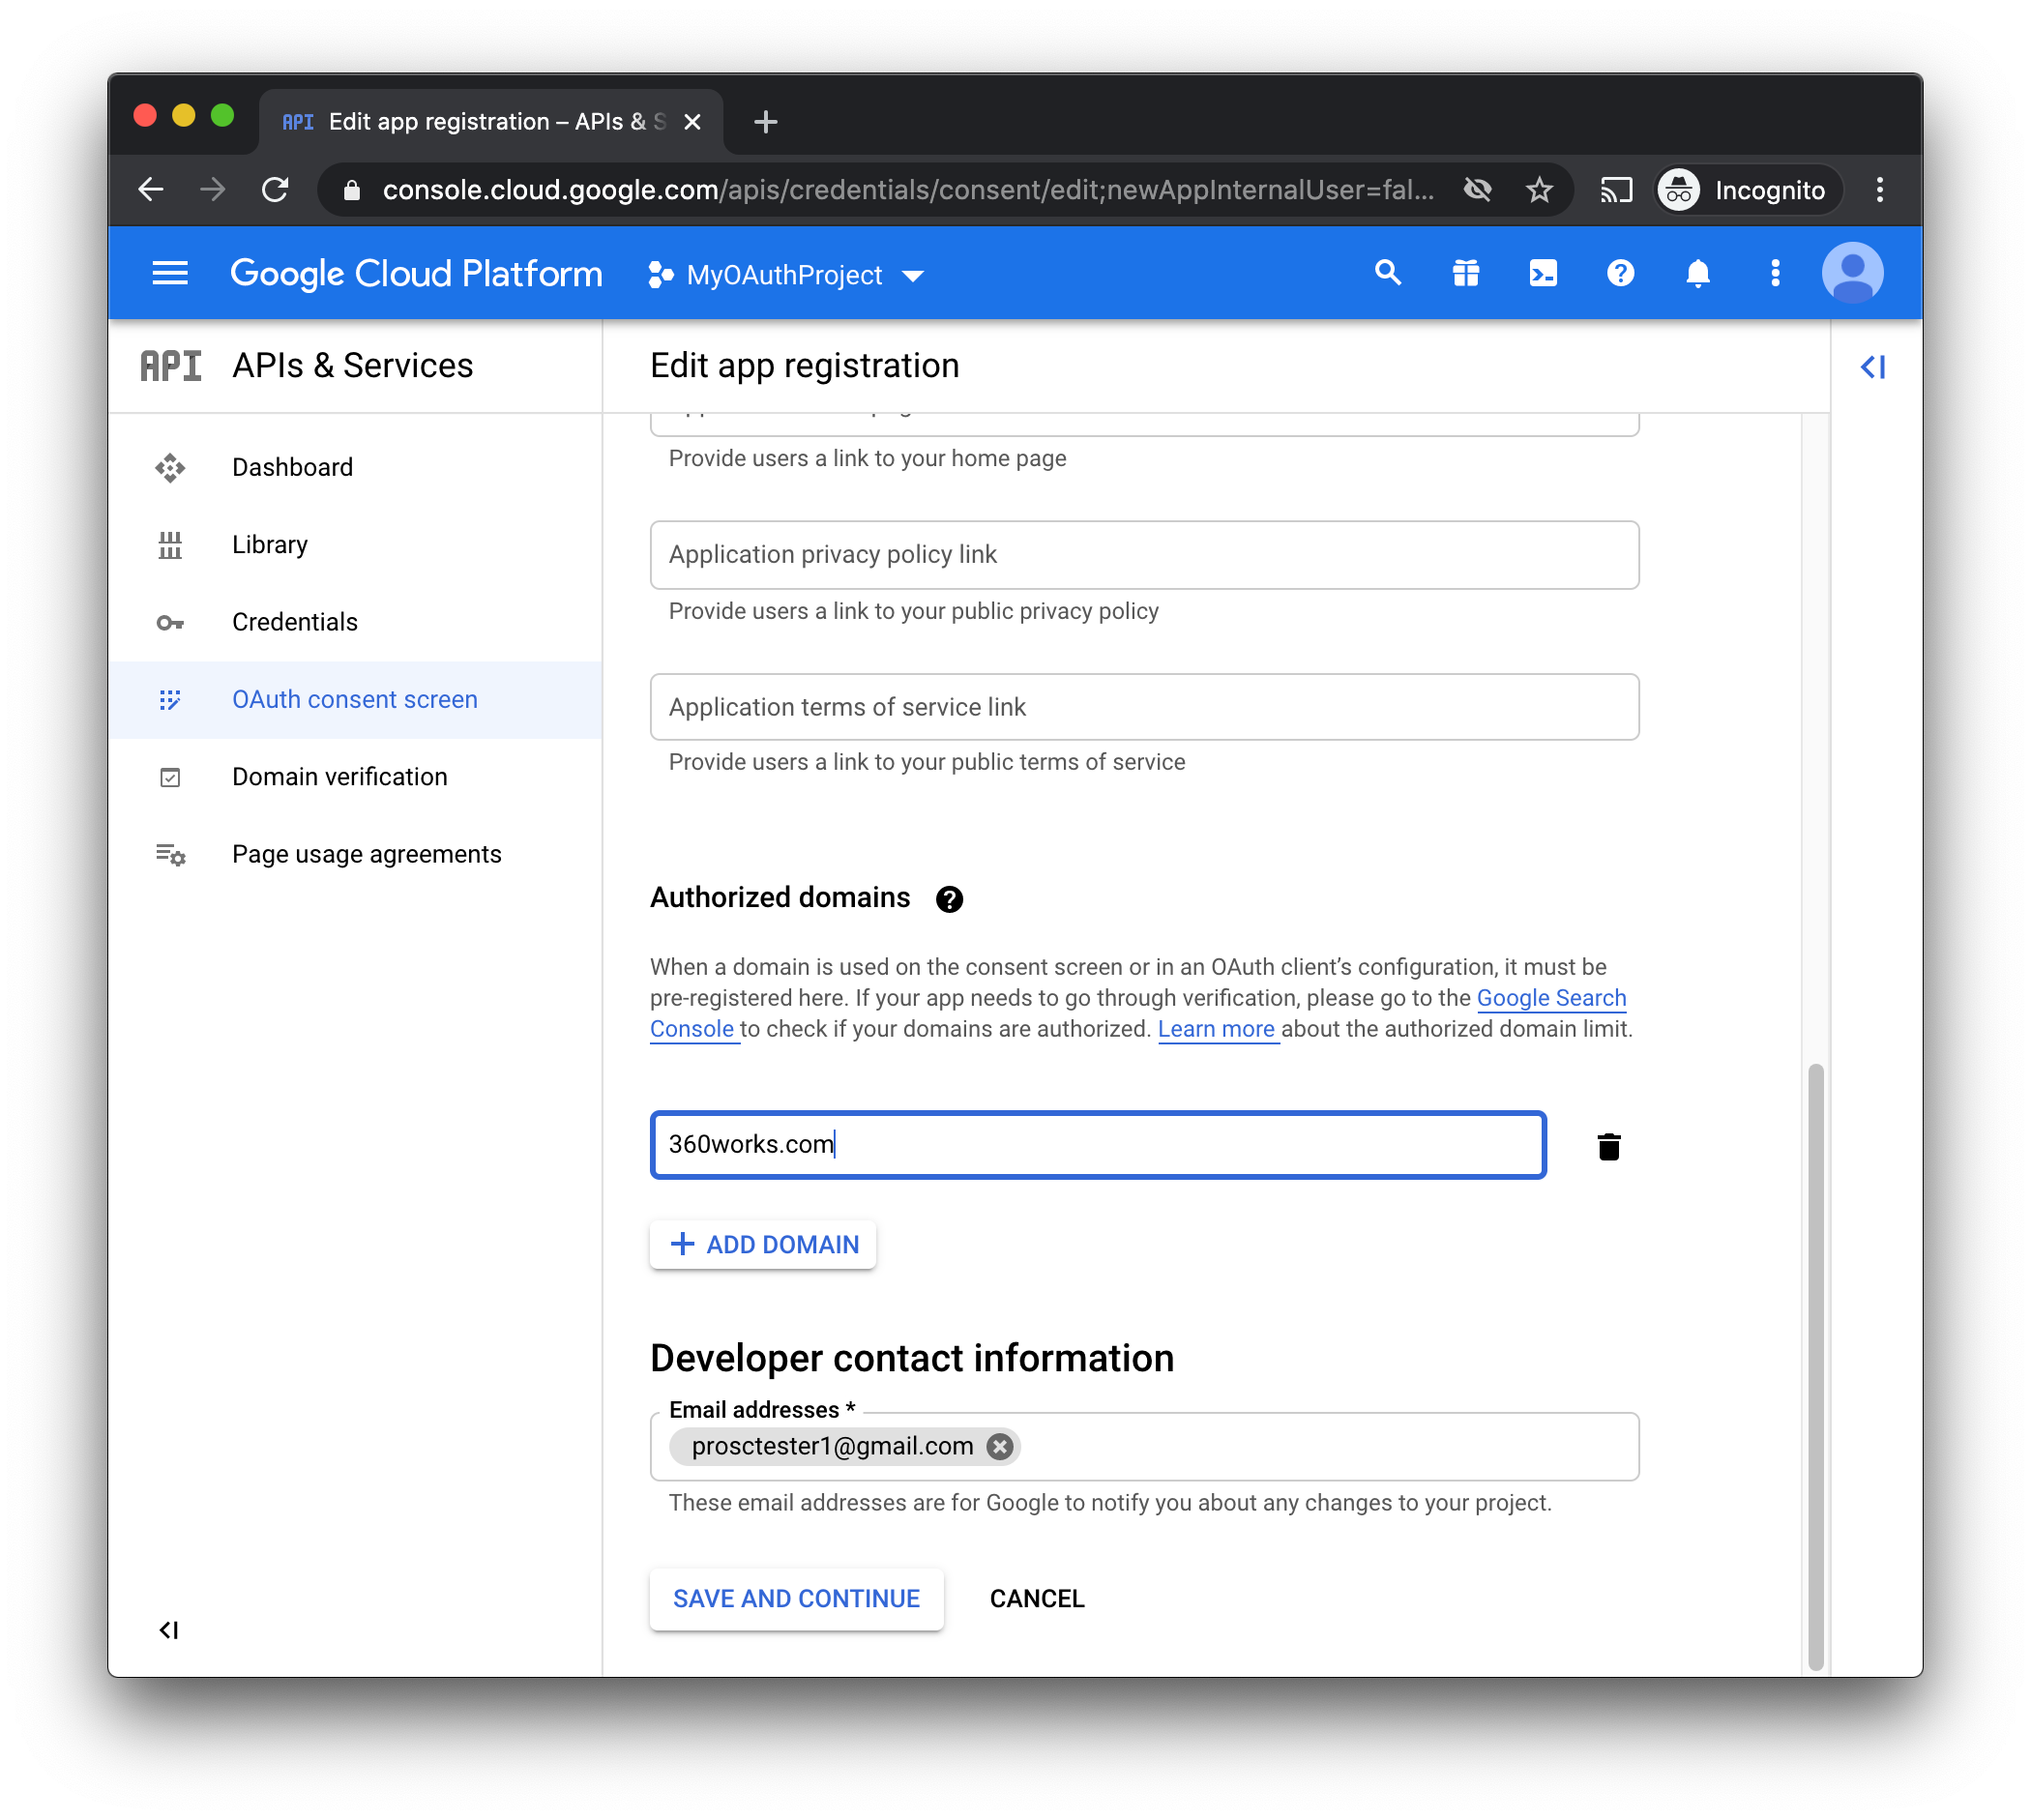
- Authorized Domains (Use "360Works.com", this is necessary for the OAuth redirect later)
- Developer Contact Information (Use your logged in Gmail address)
- Once all required fields are filled out, click "Save and Continue"
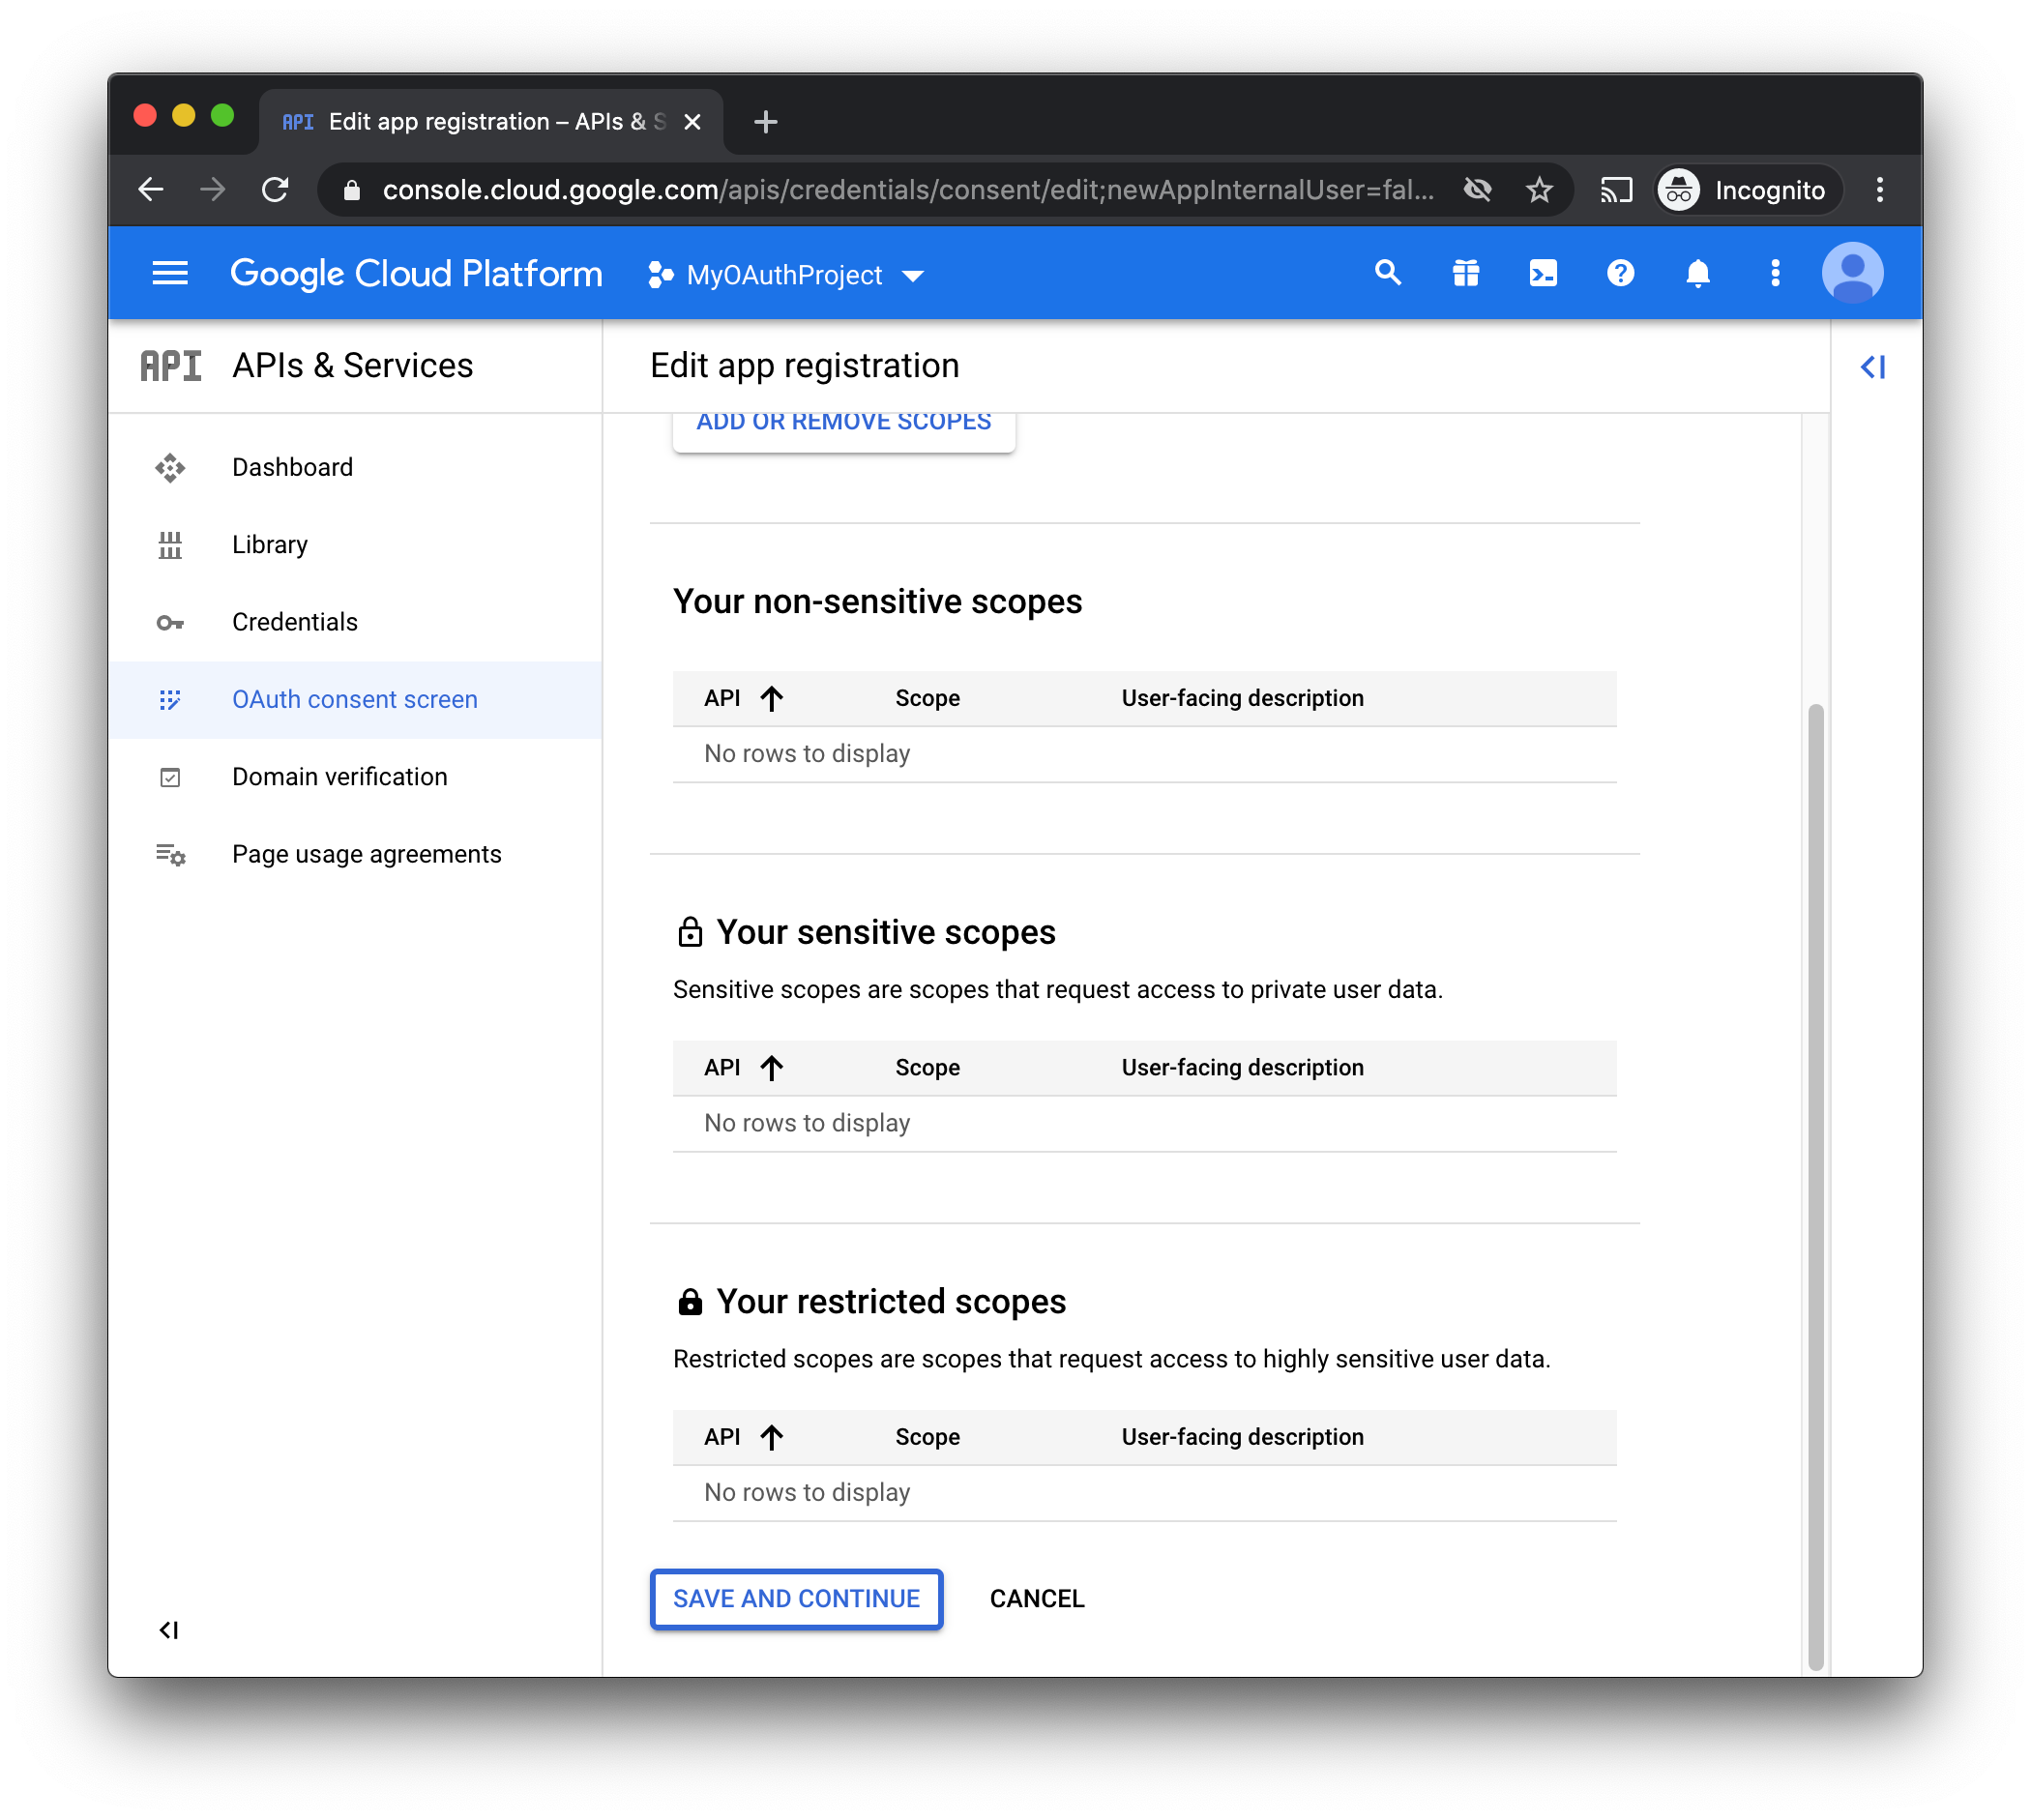
- Skip the Scopes for now, we need to enable the API so that we can select them, and we will do that later.
- Click "Save and Continue"
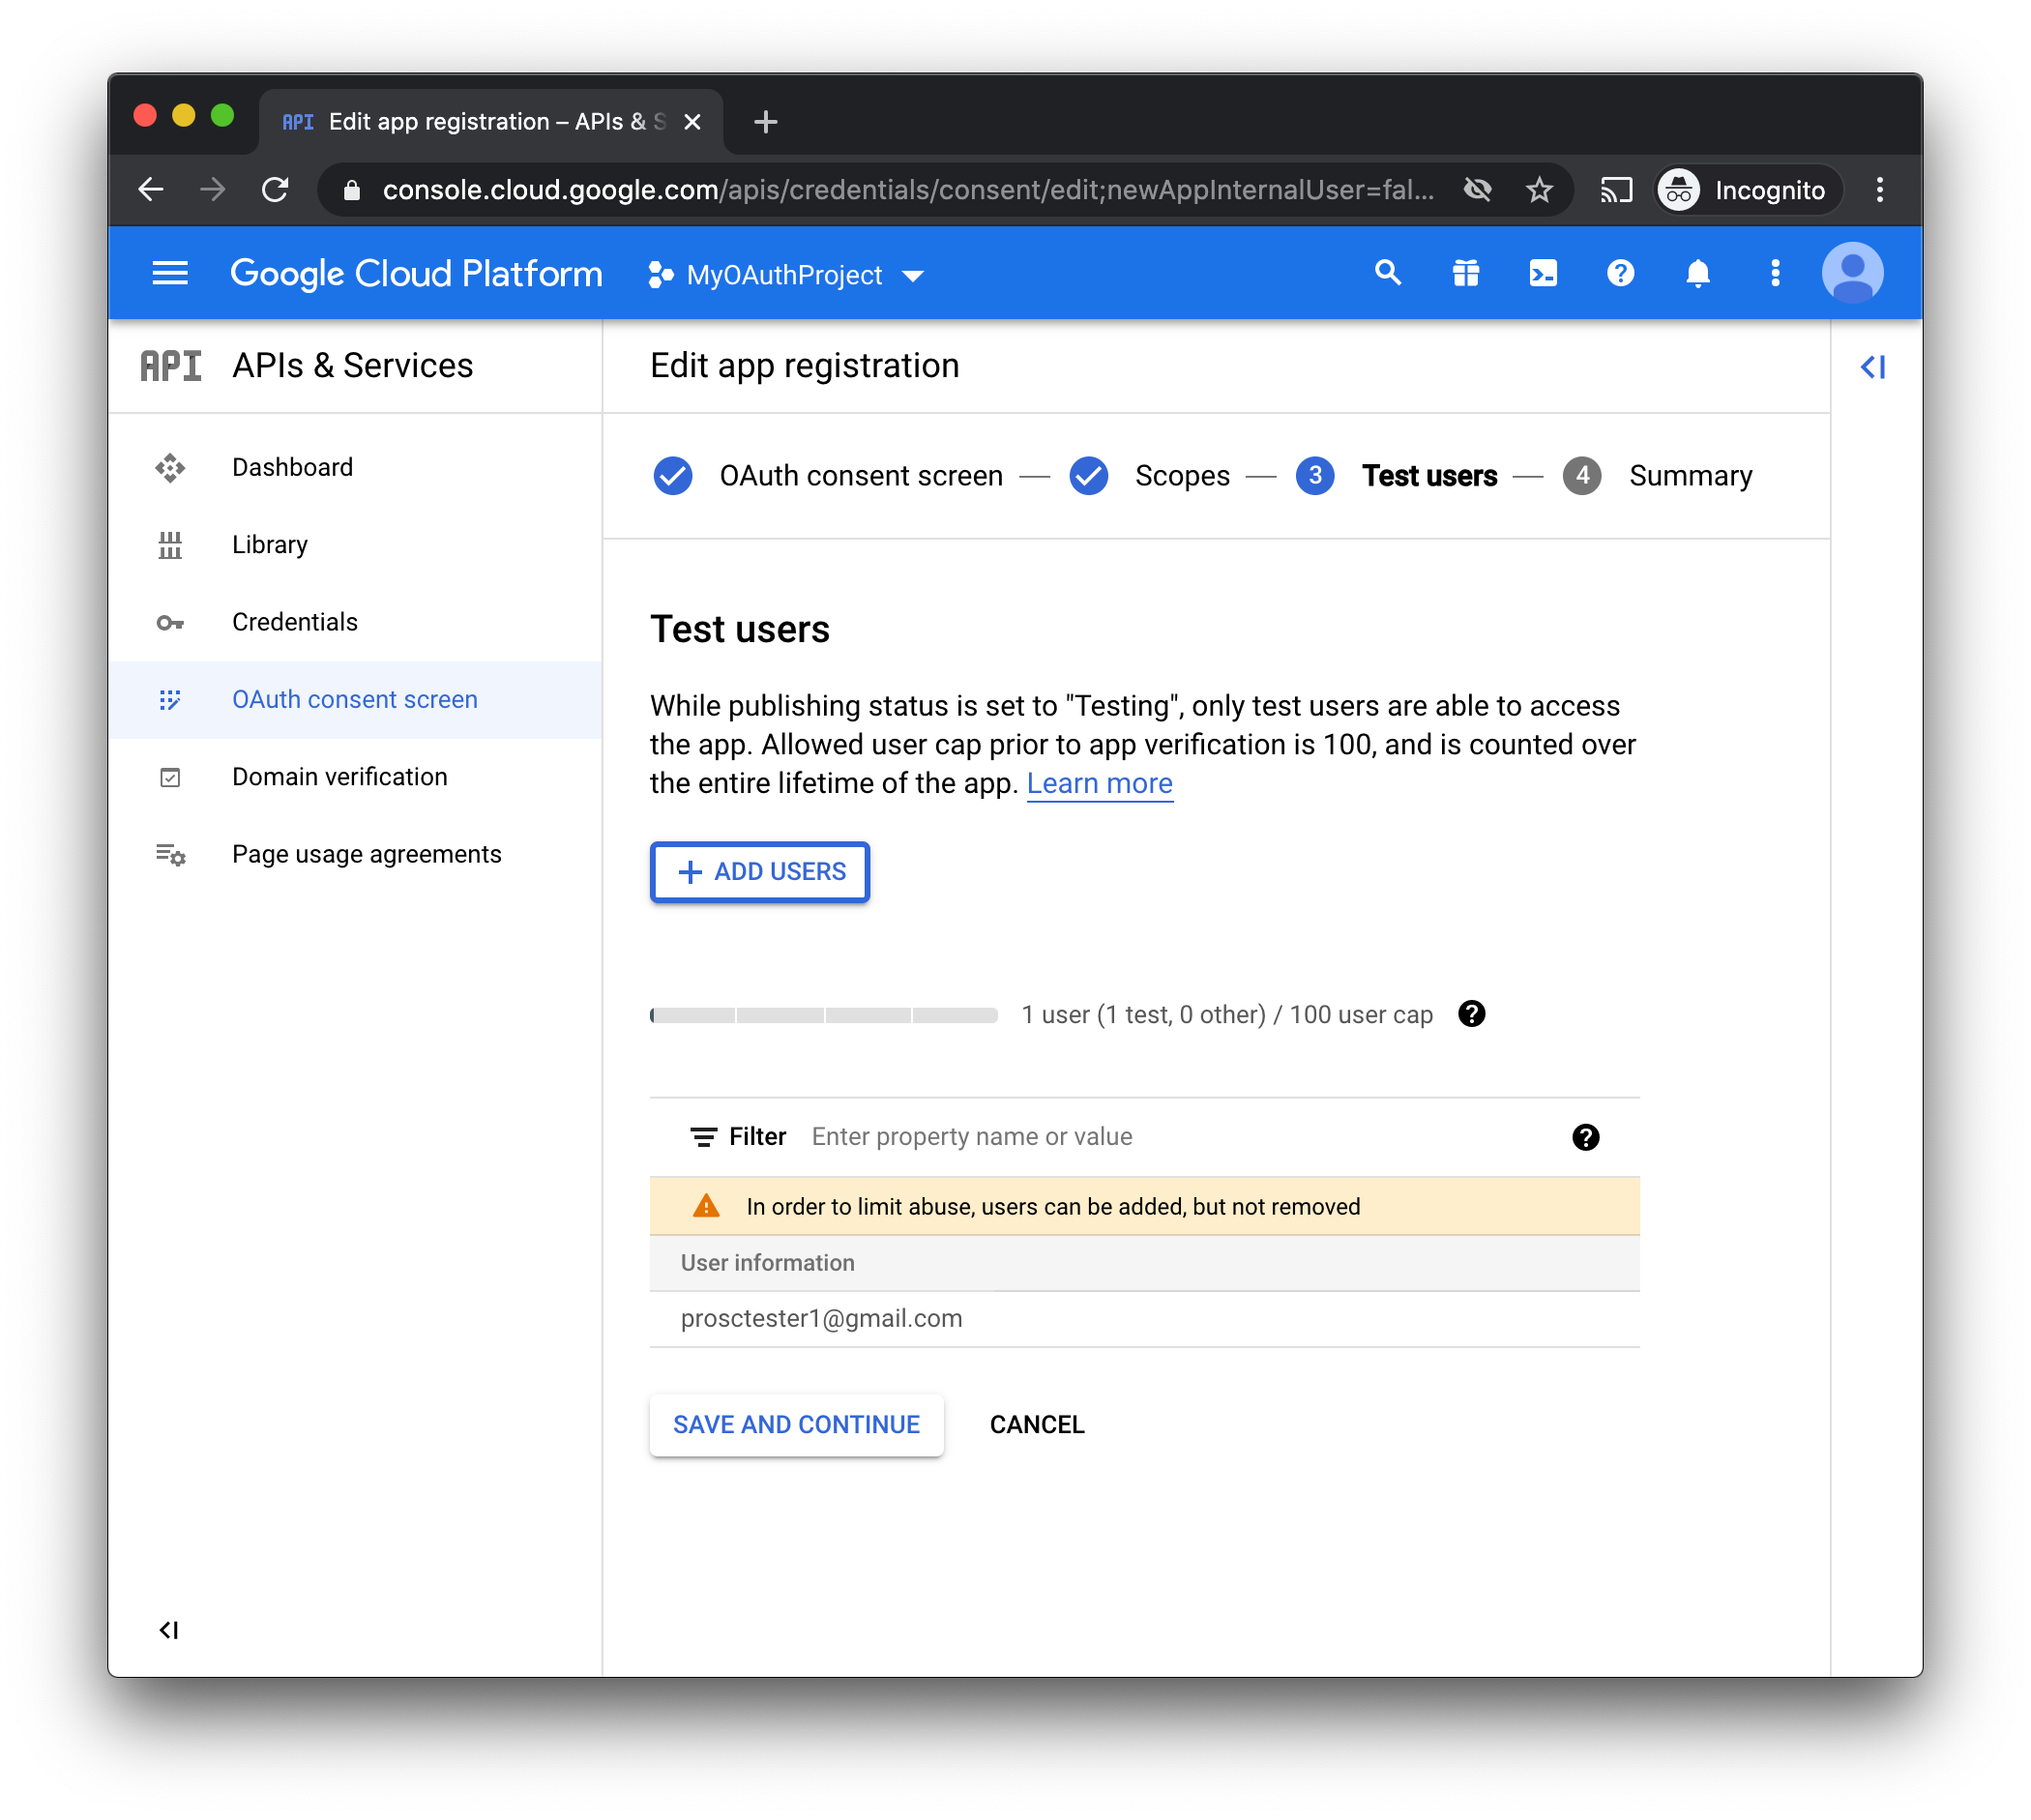
- Test Users (External accounts only. If you are a GSuite user and selected "Internal" earlier, you may skip this.)
- Add the Gmail addresses for each user that you will want to be able to authenticate with. For example, if you want to use the Email Plugin to send emails through Gmail, you will need to add the Gmail address you want to send from here. Another example, if you want Zulu to sync with a specific user's Google Calendar, add that user's email address here.
- Click "Save and Continue"
- Summary Screen. Review the details on the summary. If everything looks correct, click the "Back To Dashboard" button.
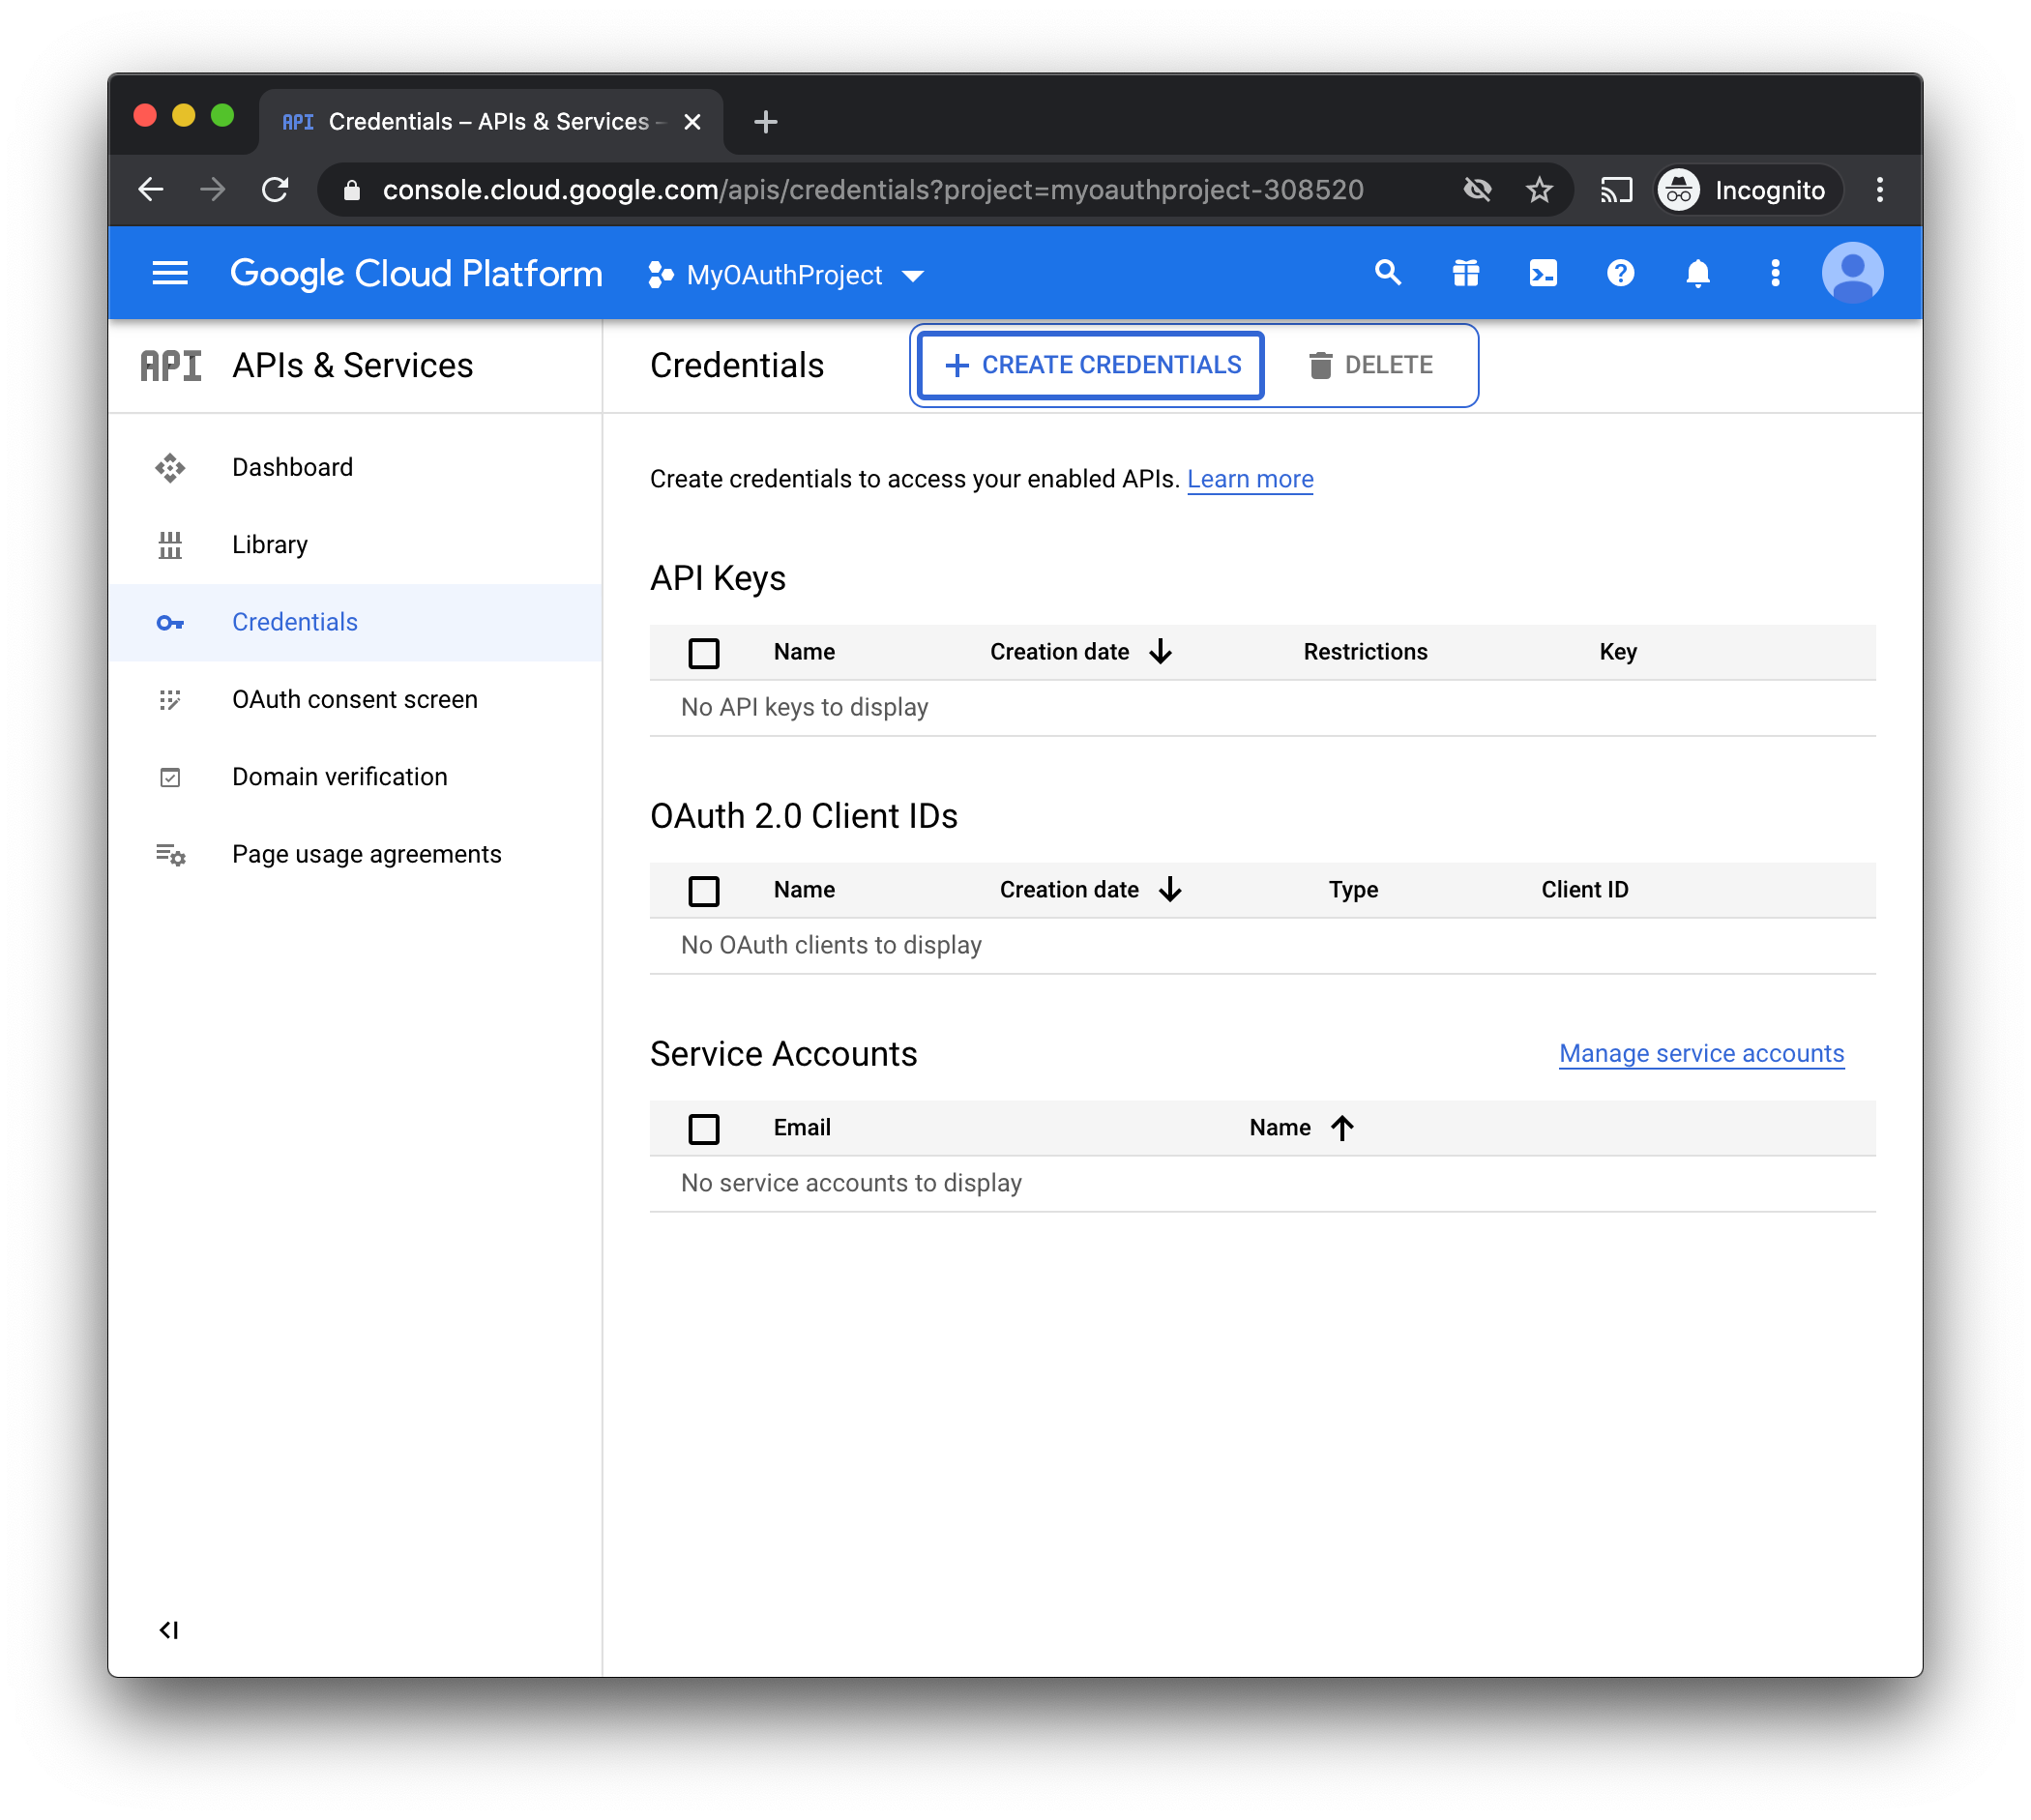
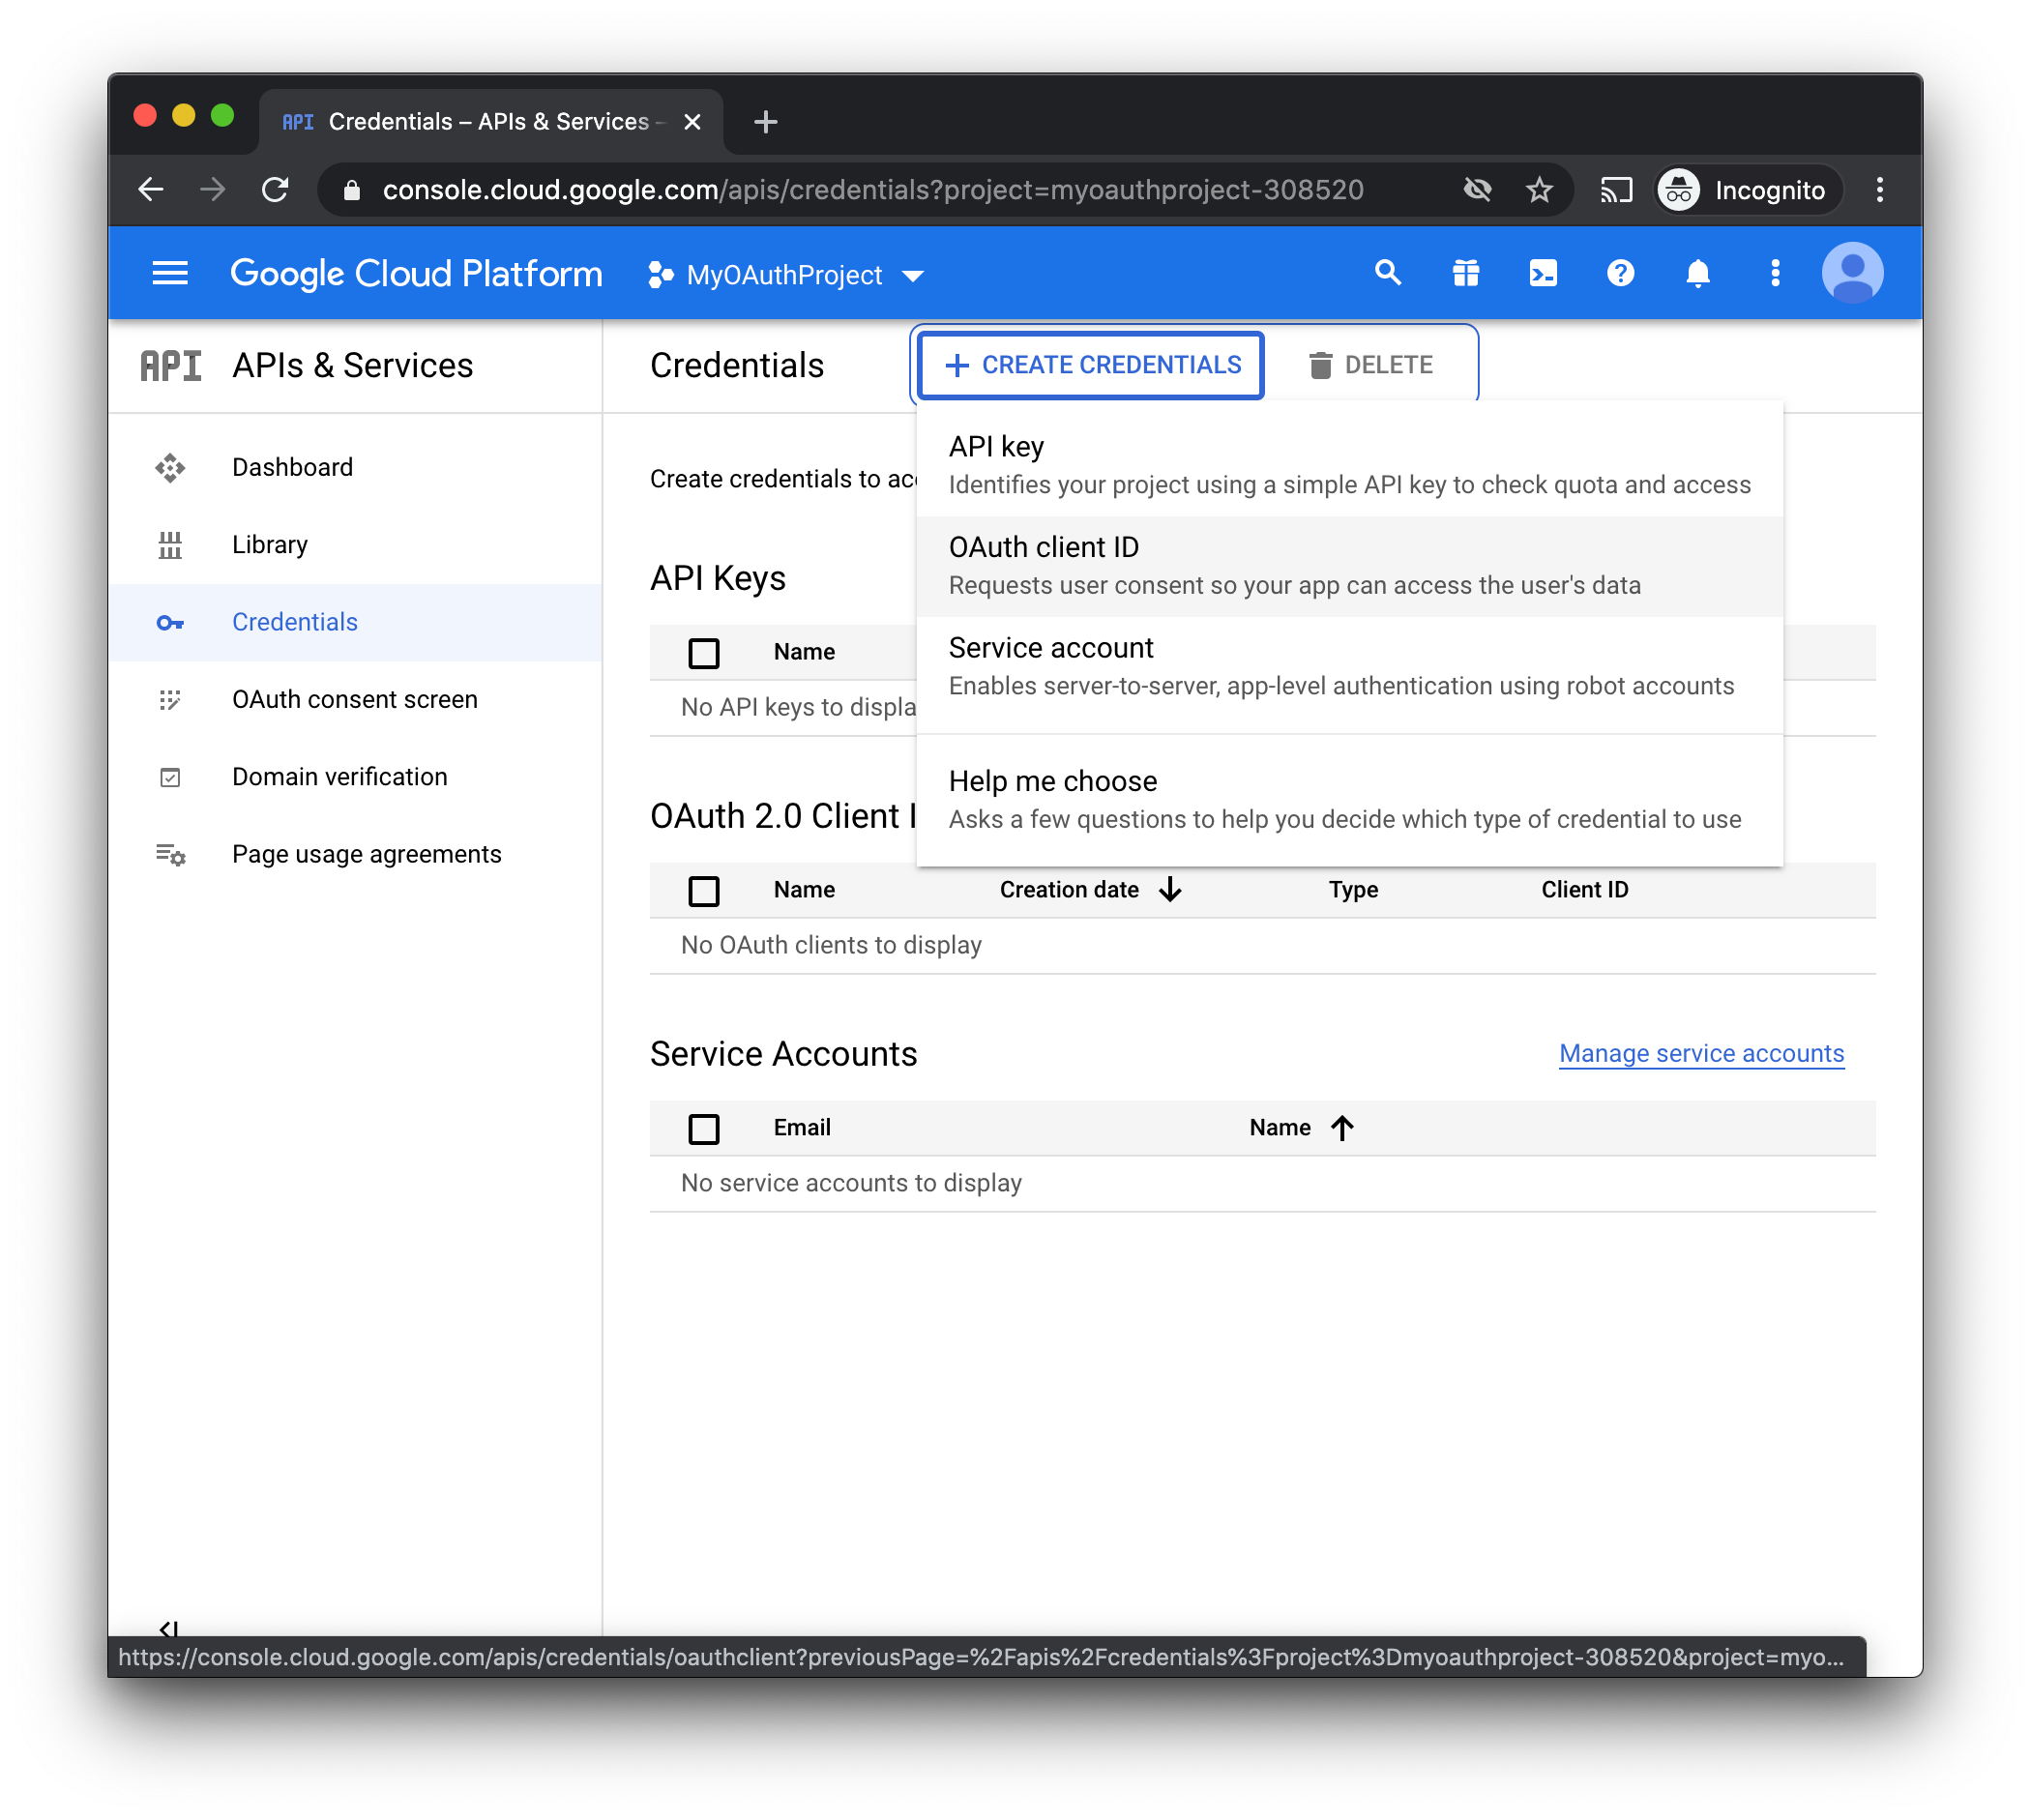
- Getting Credentials. After saving the OAuth Consent Screen, navigate to "Credentials" from the menu
- Click "+ Create Credentials", then select "OAuth client ID"
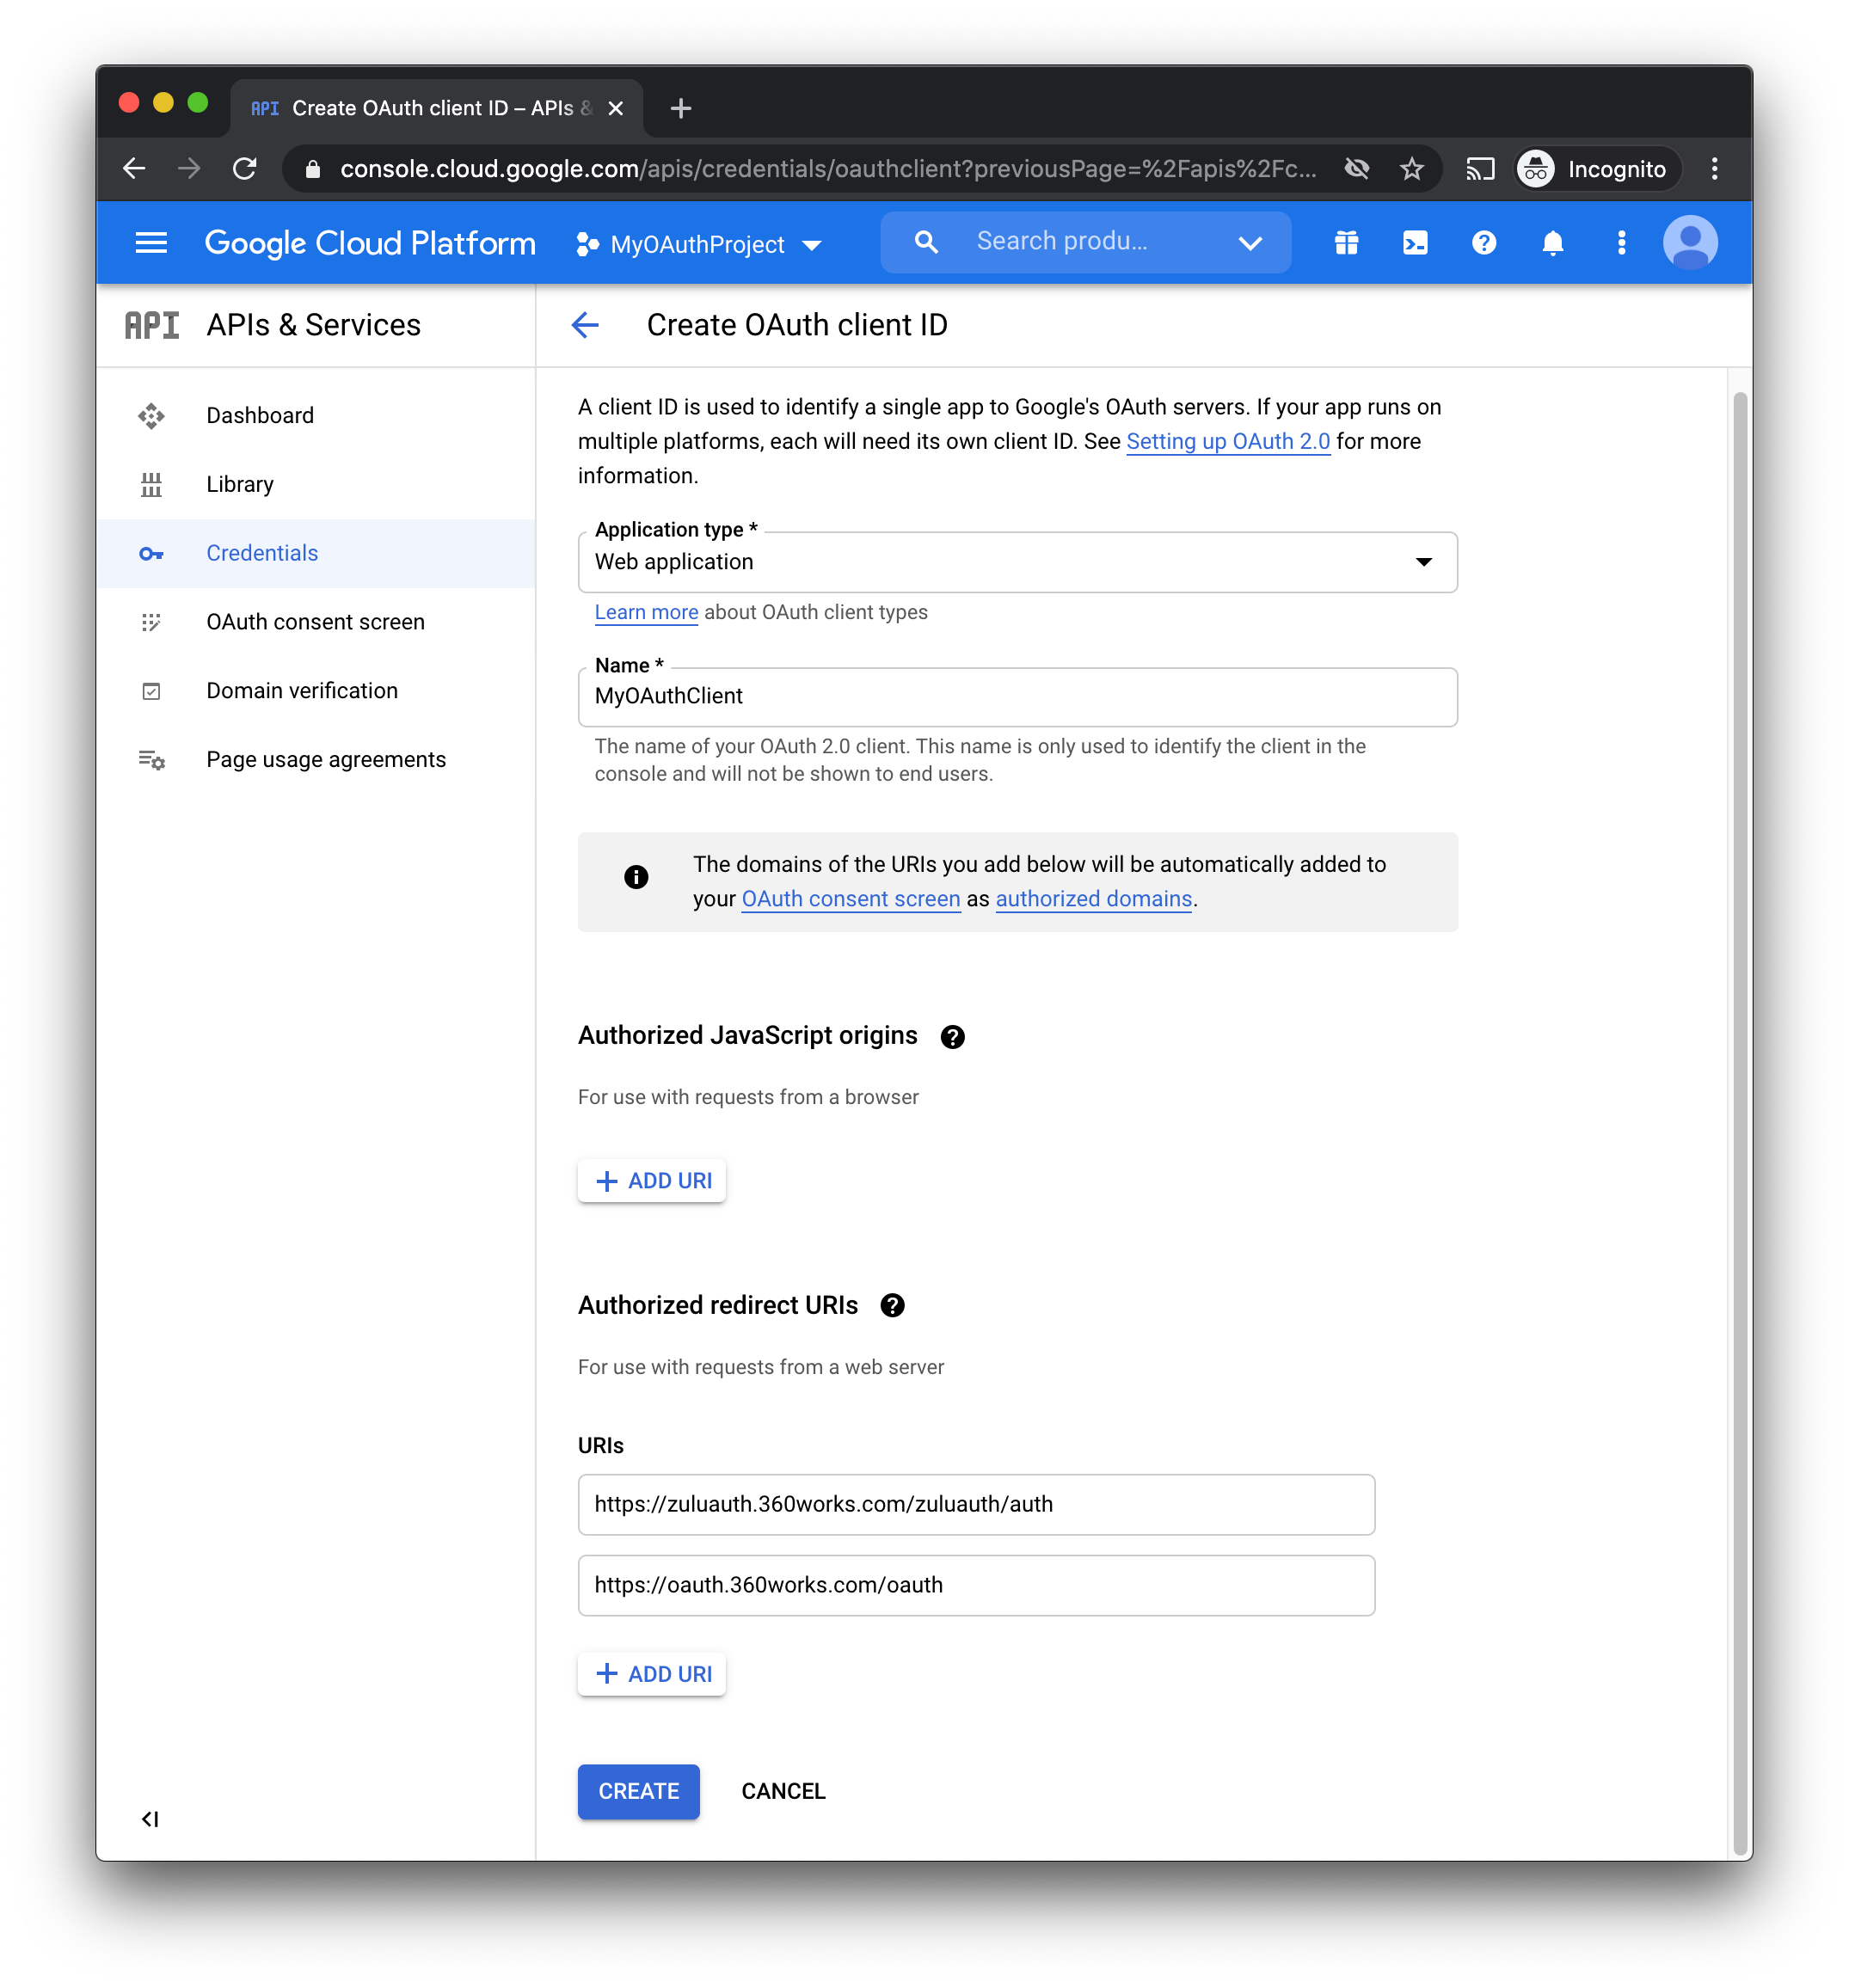
- Fill out the form with the following values:
- Application Type : Web Application
- Name : MyOAuthClient (This can be anything though)
- Authorized Redirect URIs : Add both of the following
- Click "Create"
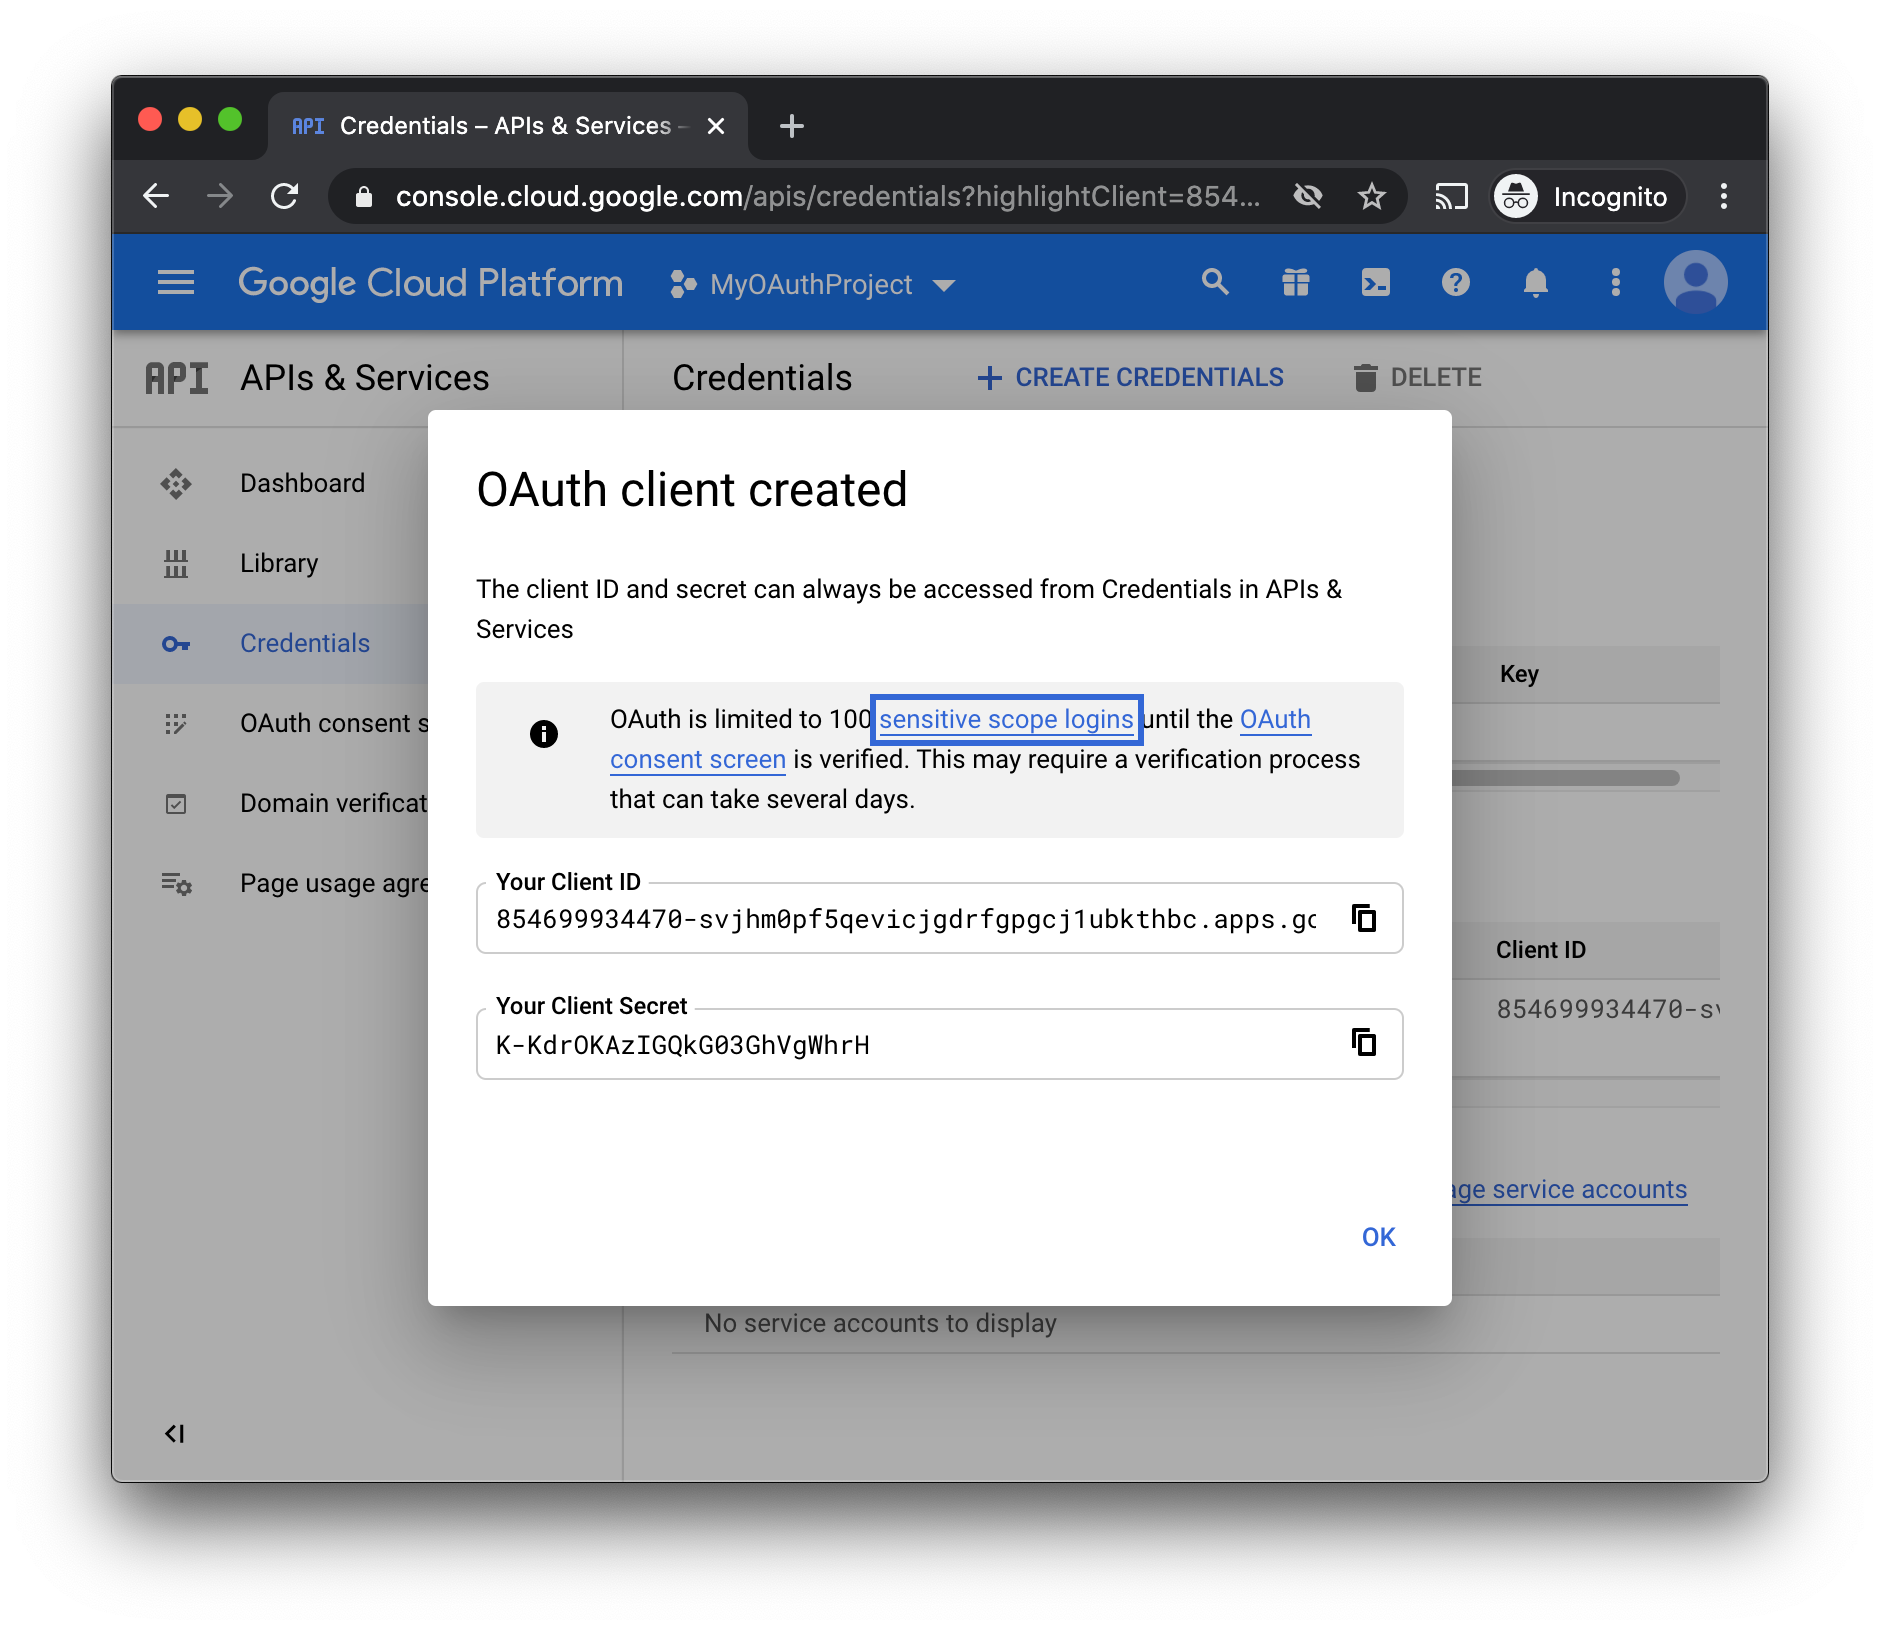
- Once the OAuth Client is created, you will be presented with the Client ID and Client Secret. Save these, as you might not be able to access them later.
- Now that the client is created, we need to enable the proper APIs and select the proper scopes. See the following pages for product specific steps:

